Z5R Web
Controller configuration
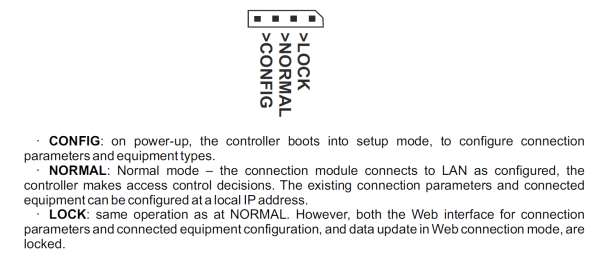
Setup the controller into the config mode:
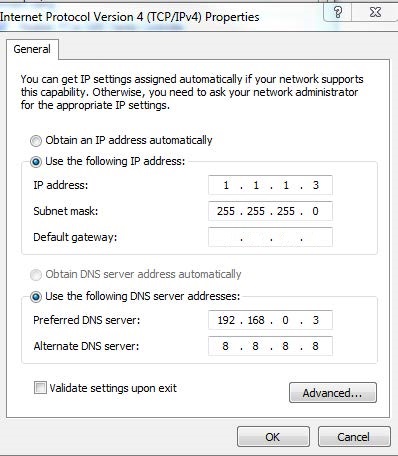
Plug the ILZ5R into your computer and set address of PC/LAP TOP to 1.1.1.3 and leave the gateway blank:
Connect to the Device via Address 1.1.1.1:
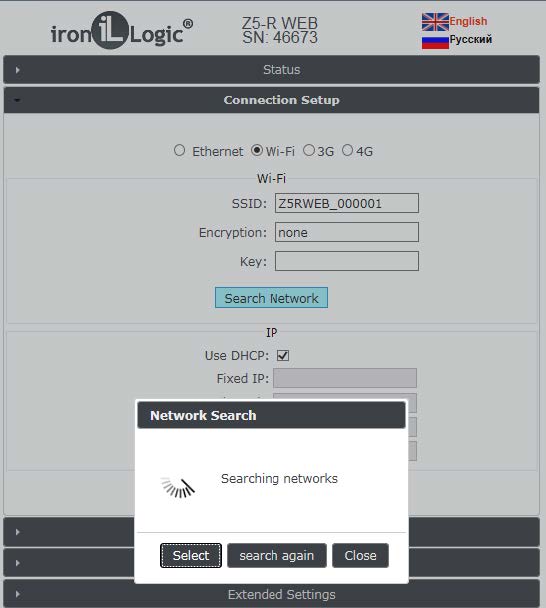
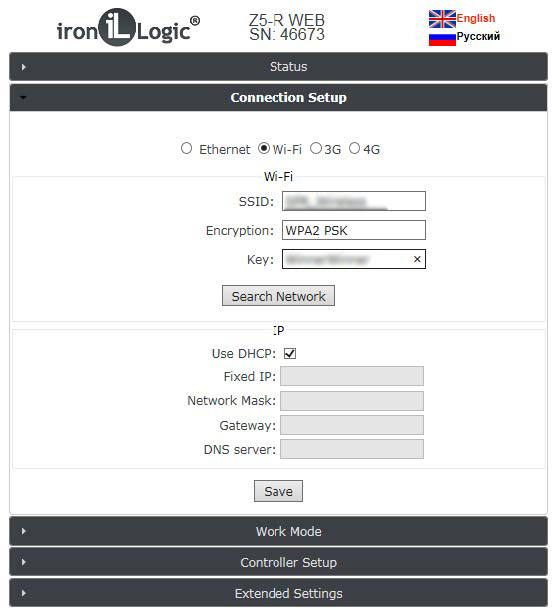
Select connection type WiFi and press enter to search for the network:
Once you have found the network enter Encryption key to connect:
Once you have successfully logged into the router enter a valid system address for you device:
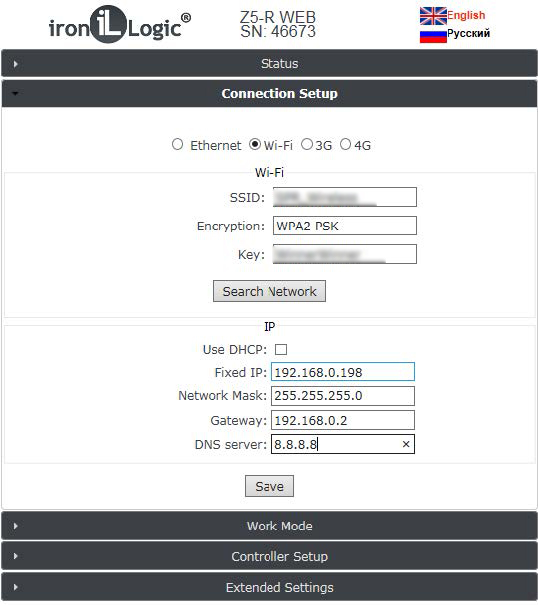
-
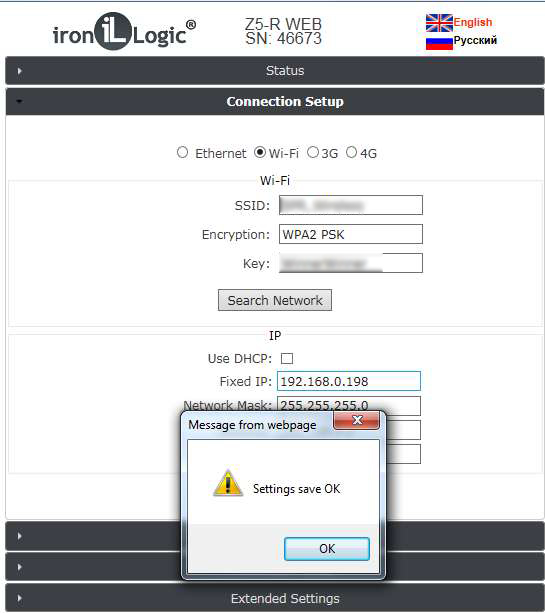
Save setting and reboot.
-
Disconnect power
- Jumper back to middle pins.
- Power up.
- You may then Use either Cloud Connection, Guard Light or Guard Commander Software depending on system requirement.
Setting your controller up for cloud access
Enter the IP address you have allocated to your device into your browse.

In this example I have used 192.168.0.198, press enter to search your network. You should see the below dialogue box.
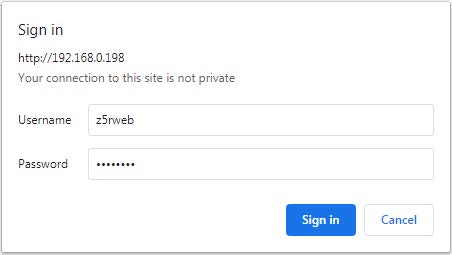
Enter the user name, (i.e the name of the device in lower case) and then the SN: of the device numbers and Letters in upper case and then sign in.
 **
**
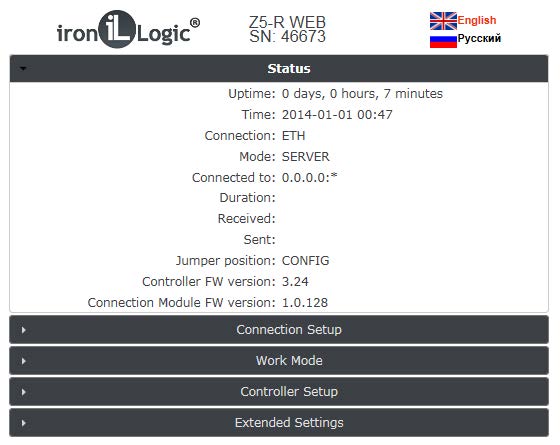
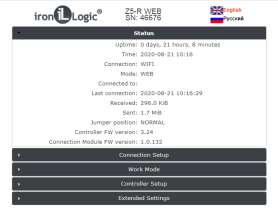
The device will display it’s status as above when ready to configure.
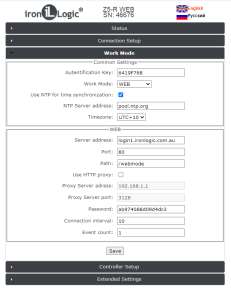
For Cloud connection set:
- Work Mode: is set to WEB
- Server address: login1.ironlogic.com.au
- Path: /webmode
- NB: There is no need to change any other setting including time-zone (the device draws it’s time from the server).
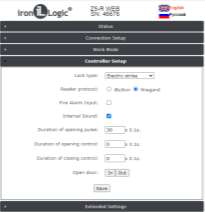
Controller Set up
Set your Lock type to: - Lock type: Electric Strike (timed output for strike) - Electromechanical: Pulse output for electrokinetic locks 1 second pulse (gate lock) - Electromagnetic: supplies constant power to the output for Magnetic lock or safe fails strike.
Reader Protocol:
-
Set to iButton for Dallas chip or Wiegand (26 default, can be set to 34, 42 or 50) for standard proximity readers or UHF devices.
-
Internal Sound: sounds a small piezo on the controller to indicate lock activation.
- Duration of opening pulse: This set the time the strike is open (note the output is in10ths of second i.e 30 = 3 seconds.
- Duration of opening control: Relates to door monitoring and specifically door forced. This setting controls the amount of time the door forced monitoring is turned off, once the maximum duration has been exceeded the system will register an event.
- Duration of closing control: DOTL (Door Open Too Long), this sounds an alarm if the door is monitored and has been left open longer than the duration allowed. Once you have finished your settings press save and log out of the controller, if you have multiple controllers you will need to set each controller with the same settings.