Employees management
The Employees are avaliable under Management->Stuff/Users menu. To add a new employee use Add Stuff/Users button on the right top side of the screen:
GENERAL TAB
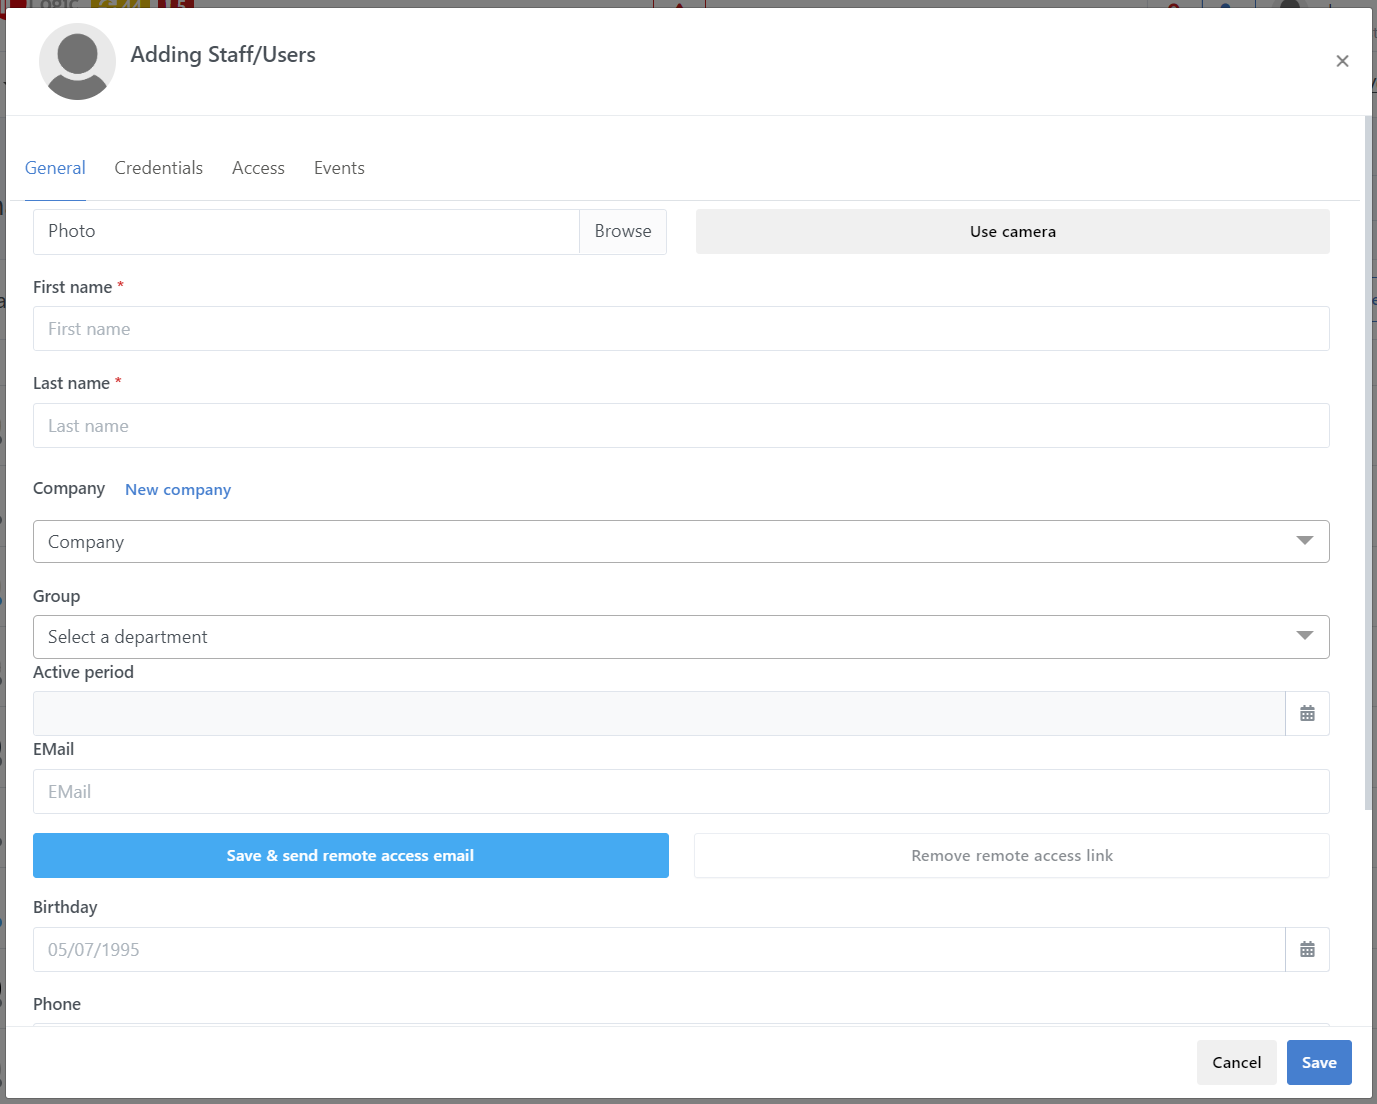
Face photo: Employees face image can be taken with the web camera or uploaded. The face image will be analyzed with and compared with the faces stored in the system for the account (face recognition features).
FACIAL RECOGNITION
When adding a new user an option to upload an existing photo or to use the camera on your device are available.

These features enable the use of facial recognition. When uploading or taking a new image make sure the image meets the following requirements to ensure a successful upload to the database:
-
Face takes up between 50-75% of the picture.
-
Picture is taken head on.
-
Picture is clear.
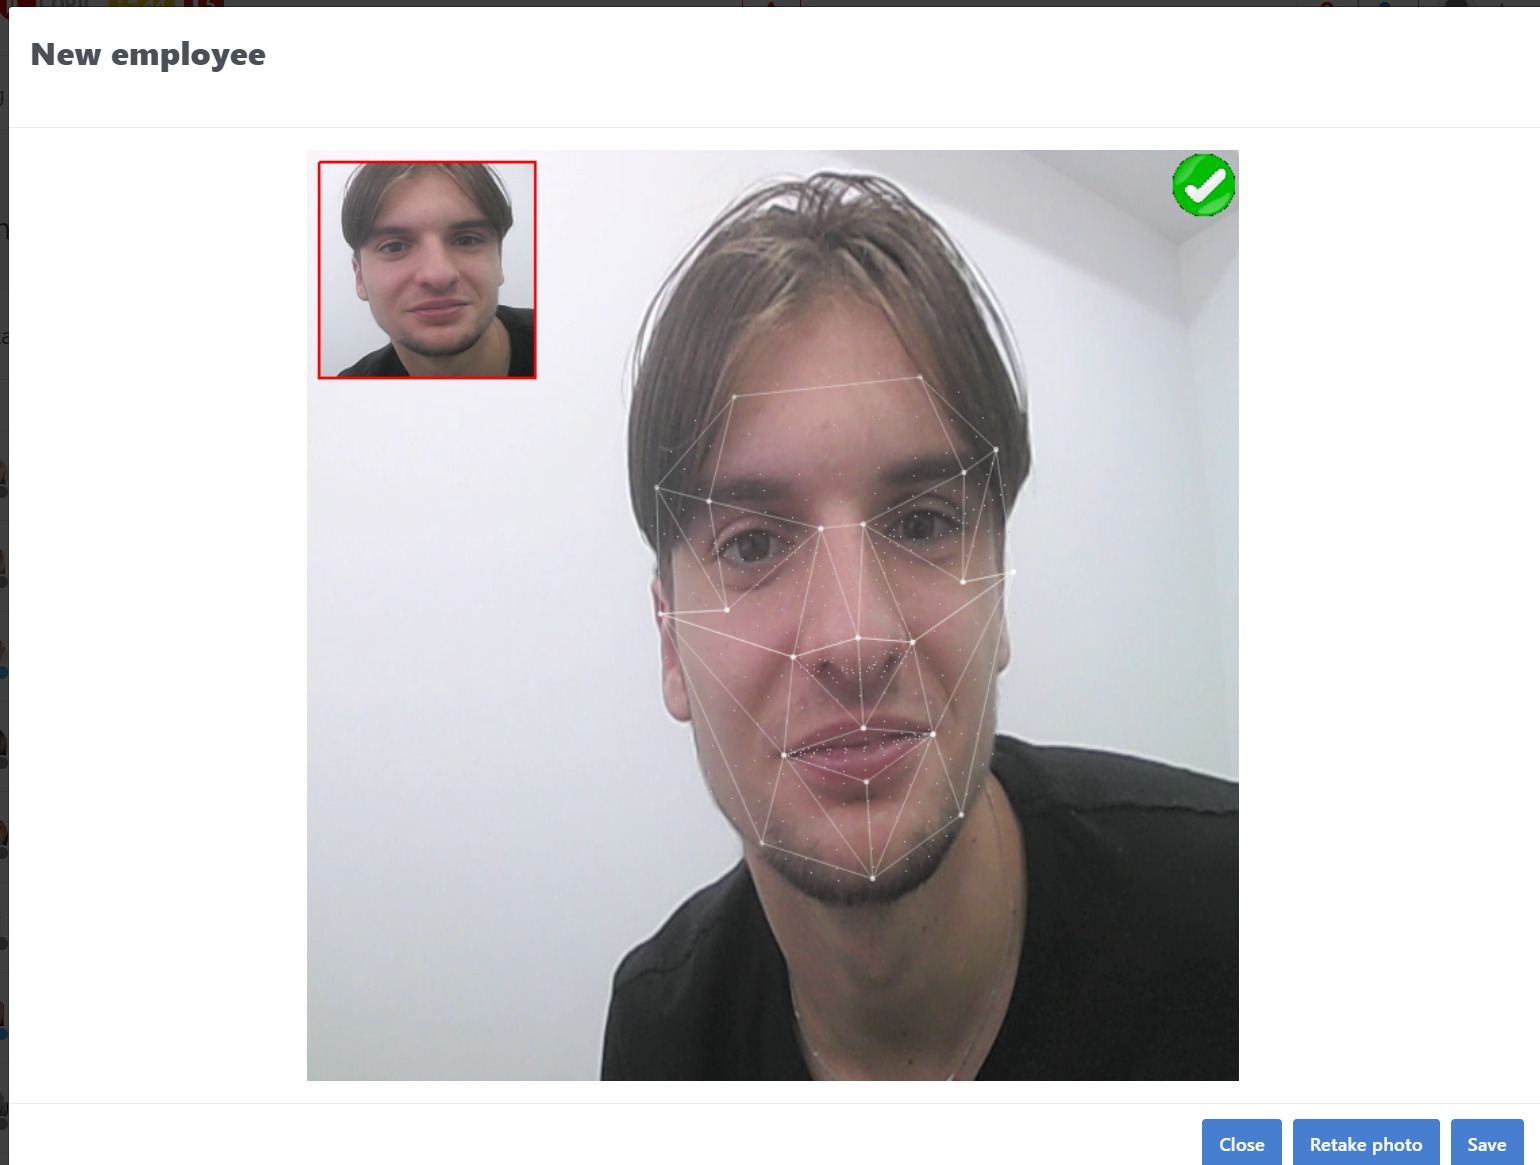
When taking a new picture the system will display the pitch, yaw and roll values of the current image at the bottom left of the screen and will not take the picture until the face is centered and facing the camera straight at the right position.
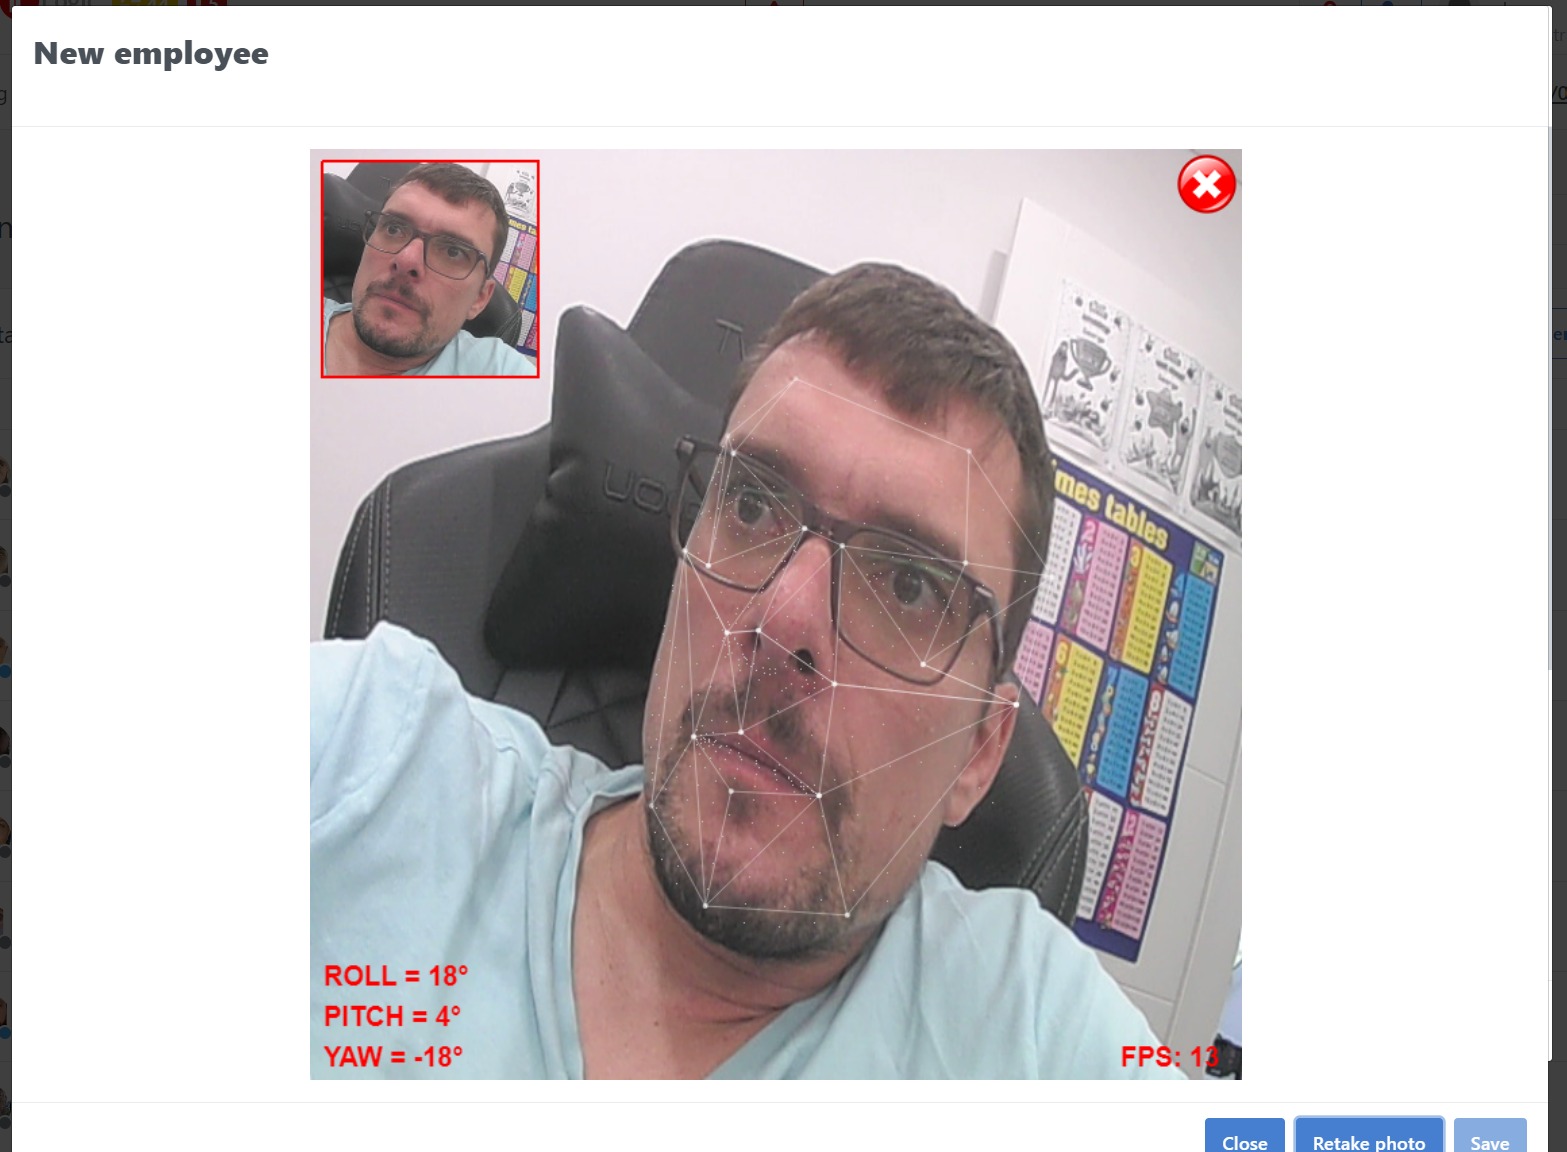
Once the picture is caputered, it will be compared with the account's database of existing users and their faces. If the picture is not identified with a high enough accuracy, then a green arrow will appear in the top right of the screen, denoting that the face was not detected in the database and user may be added following the regular procedure.
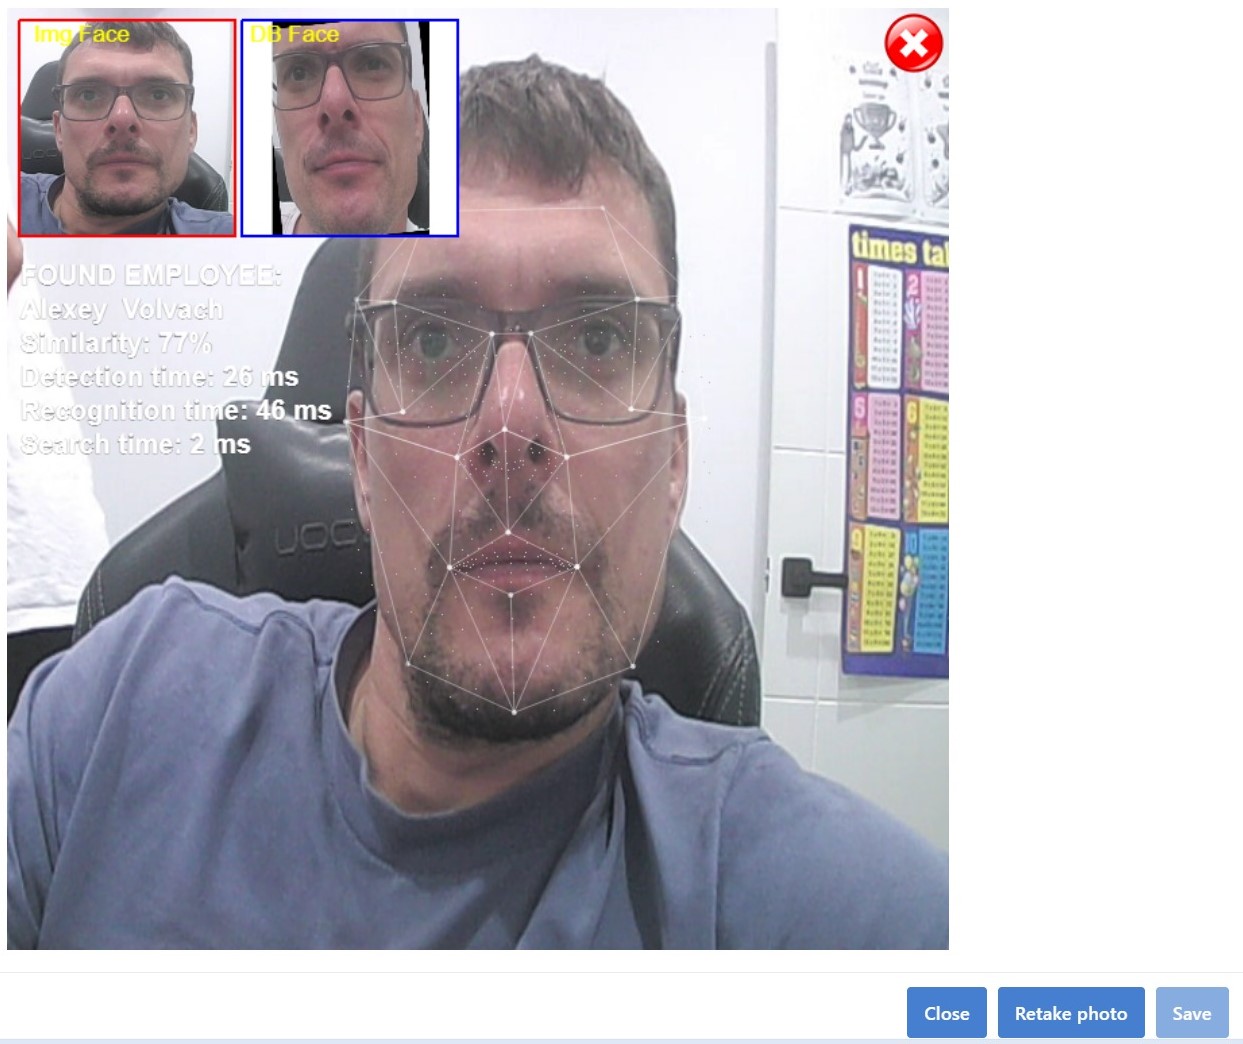
If the face's similarity value is above the set threshold a red cross will appear in the top right of the screen and the users details will be displayed on the picture. In this case the image cannot be used to create a new user.
- The similarity threshold value can be set within the settings tab under "Face recognition similarity threshold".
- The digit values range from 0 to 1 and represent precentage values of 0% to 100%, where the system will only recognise a face if the similarity value of a taken picture is above the set similarity threshold.
In the case below, the similarity threshold value was set to a value below 0.77, hence the face was identified with a similarity of 77%. This meaning the system has a 77% certainty that the face in the taken picture is the same face as one that is stored within the database.
First, last name: User name. Last Name: User Last name.
Company: Employee's company. In the reporting, logs the company filter can be applied
Group: As Detailed above users can be grouped together if a group of users share the same access areas and access levels.
Valid From: Determines the Date and Time at which a credentials becomes active thus granting access.
Valid Until: Determines the Date and Time at which a credentials becomes in-active thus denying access.
E-mail: Email data only. If being used a data only enter the email address here (do not press) Save employee & send remote access email. To save Data only press SAVE at the base of the page instead.
Email Access: Allows access to selected areas via a web link either via phone or computer. For this option enter the email address and select the user’s Group, then press Save employee & send remote access email. For more details see below.
CREDENTIALS TAB
Credential are either Cards, Fobs, Keypad pins or Email acccess.
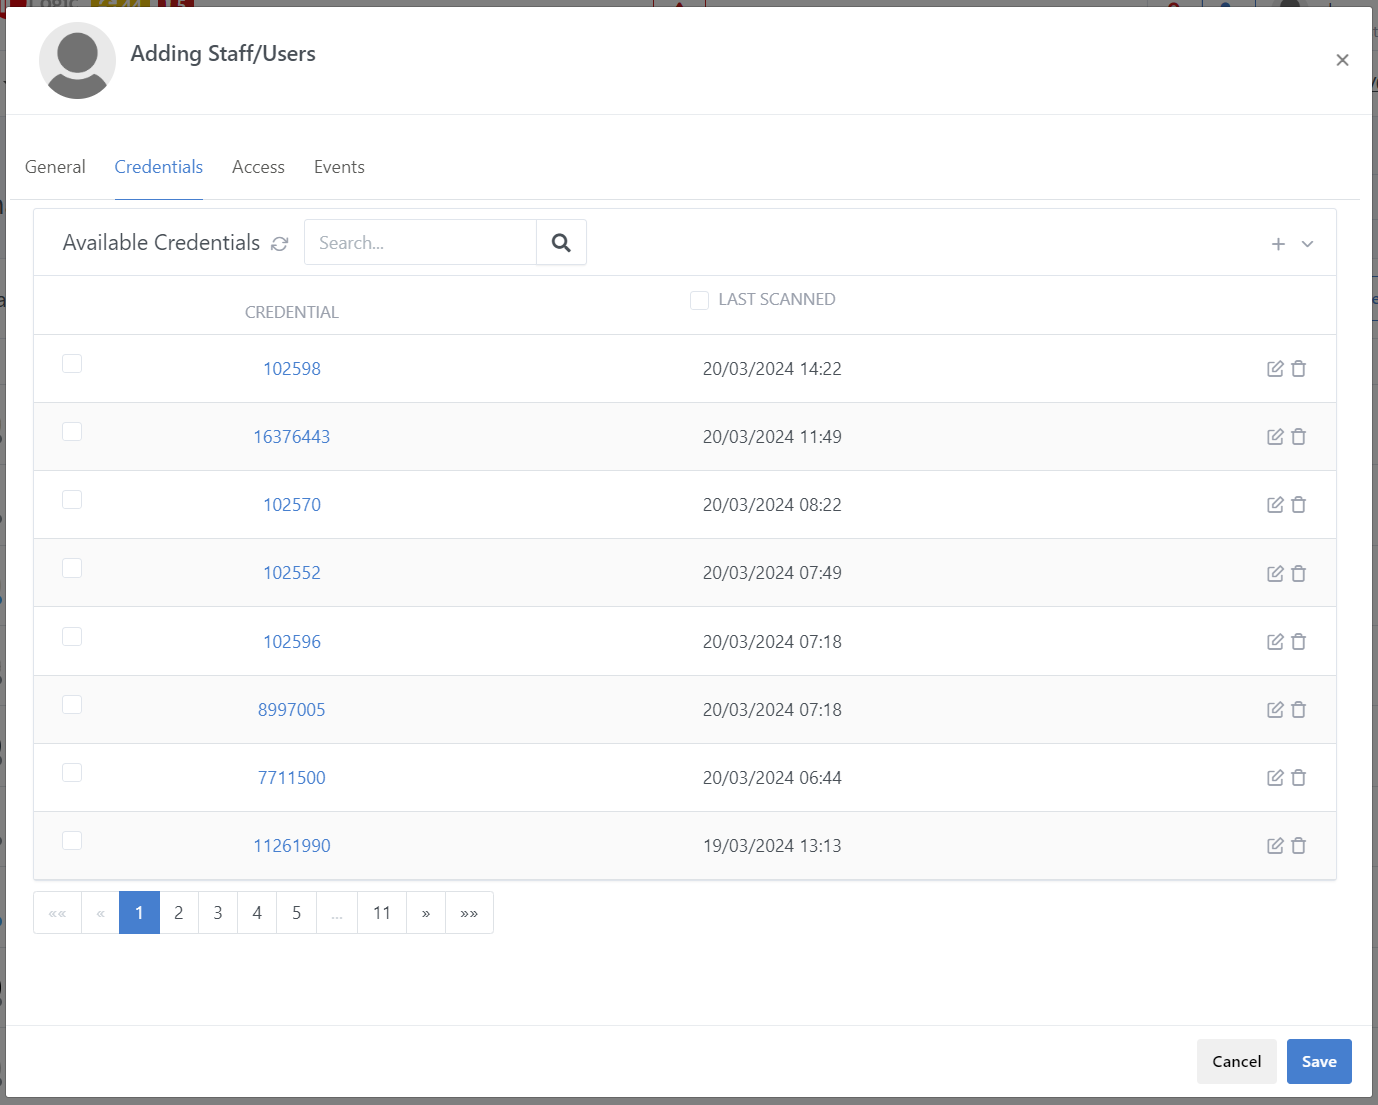
The Available Credentials list showing the RFID keys scanned on the system, but not linked to any employees (free credentials). With the + (plus) button new credentials can be entered manually. Please note, at least 1 credential shoud be added to employee (either RFID access or face recognition) to register the face/rfid credentials in the access control equipment.
When adding RFID credentials, the key can be entered in 4 different formats: Wiegand (site code and the key number), Decimal, Hexadecimal and iButton formats. Switching inbetween the formats automatically convert the entered number. Also, the credentials can be entered into the system in batch/range by specifying top and bottom limits of the range:

ACCESS TAB
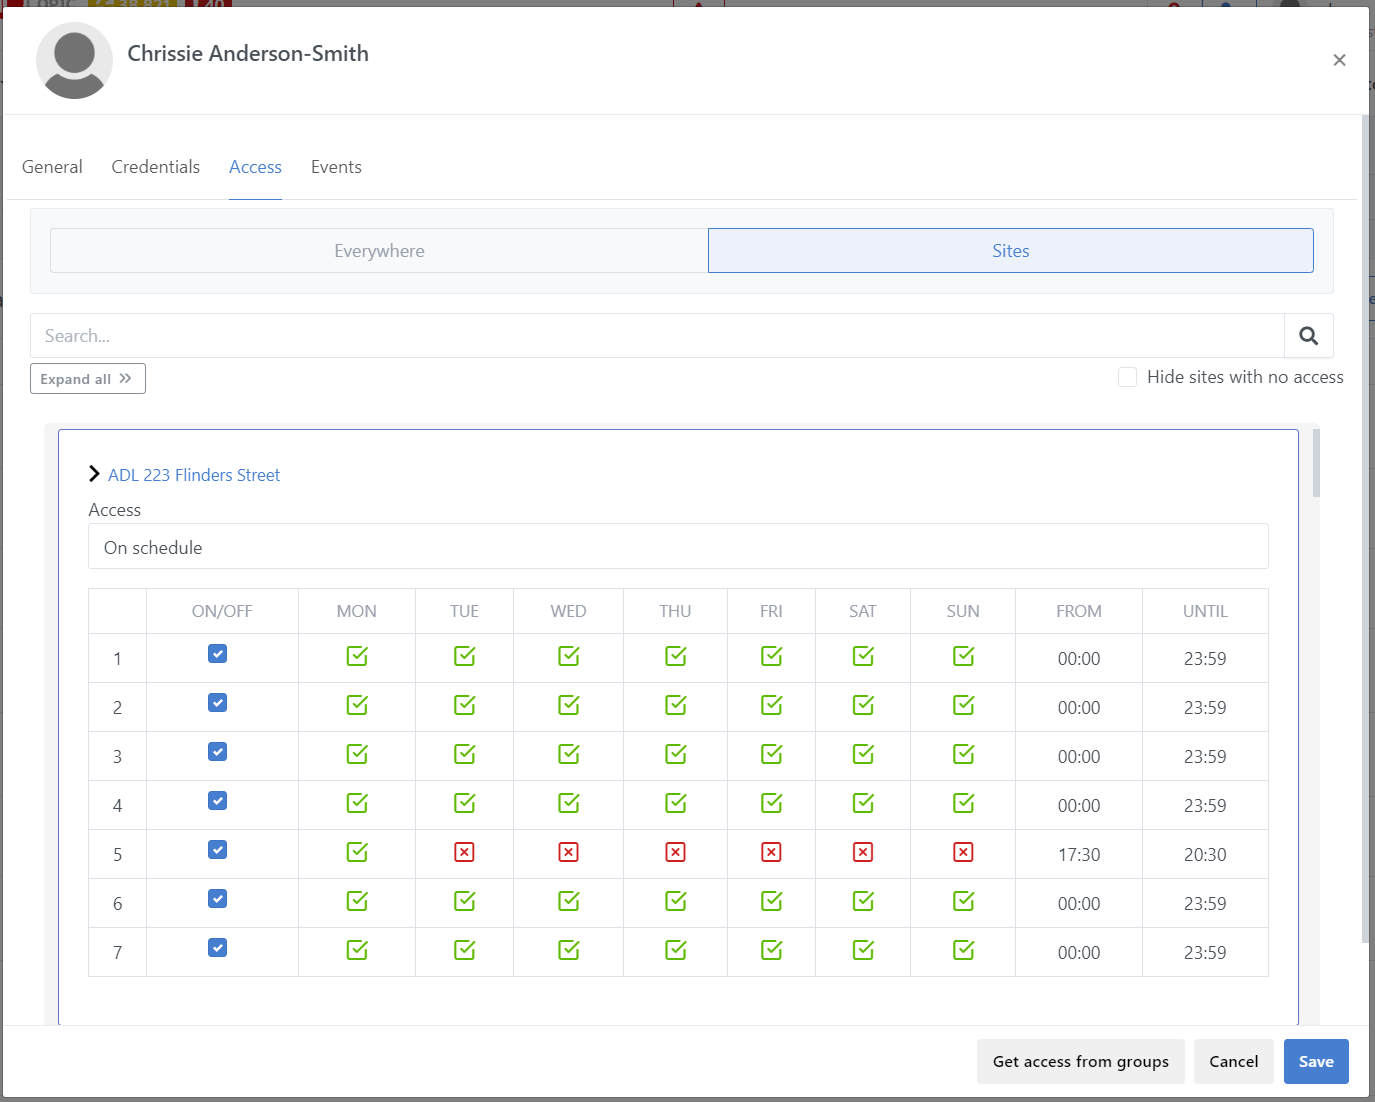
Employees access can be setup in 3 options:
- Always everywhere: where new sites added to the system will be automatically assigned with 24/7 access for the employee
- Never: no access to any site
- Per site (Site tab on top): individual access rules per site can be configured
When employee's access control configuration setup by Site, then access rules should be conigured for every registered site.
Every site can be configured with 3 access options: Always - 24/7 access to the site, Never - No access to site and On Schedule any preprogrammed configuration of timetables can be applied in that mode. The controllers can hold up to 8 independant time tables and time-tables can be configured in Site settings. Week days and the times can be applied for every time table. When selecting multiple timetables as the access, then the rules will be combined (union), ex. if first timetable allows the access on Monday only from 8:00 to 13:00, and the second on Tuesdays from 10:00 to 11:00, then selecting them both will grant the access on Mondays from 8:00 to 13:00 and on Tuesdays from 10:00 to 11:00.
EVENTS TAB
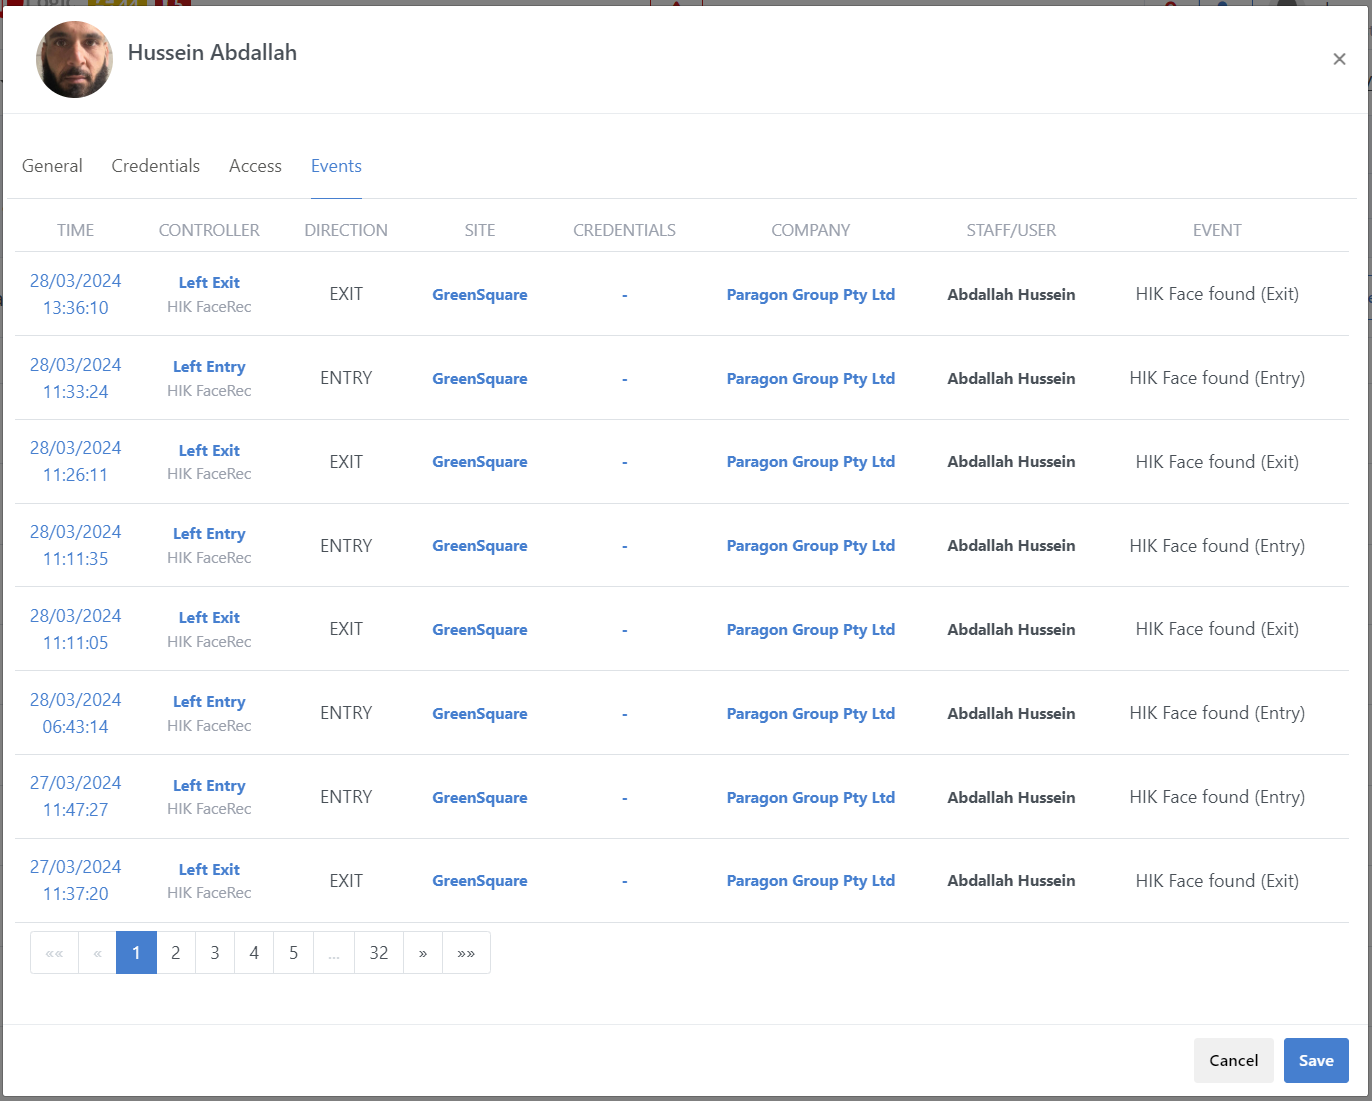
Employees events shows all the registered access control events for the selected employee with the sorting from newest to oldest. If event has an image (either from face recognition module or CCTV camera, then the snapshot can be opened by clicking on timestamp of the event).