Main
Setting up your Access Control Through the Cloud.
Before proceeding create an account using “Getting Started” http://docs.ironlogic.com.au/
After you have registered your account, you will receive a confirmation email; confirm your details and then procceed go to: https://login1.ironlogic.com.au
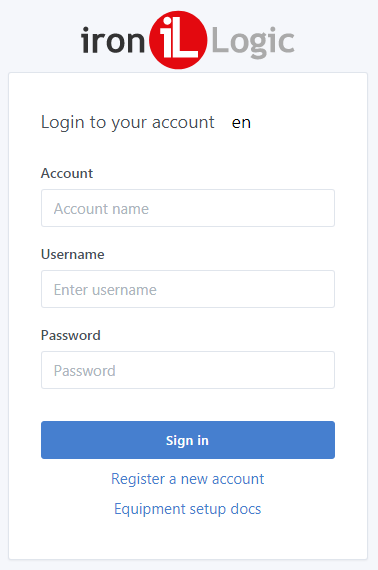
Enter your Account details, Username and Password as described in the Getting Started section.
Press Sign in to enter and setup your site.
Online help is available by clicking on the Equipment setup docs tab.
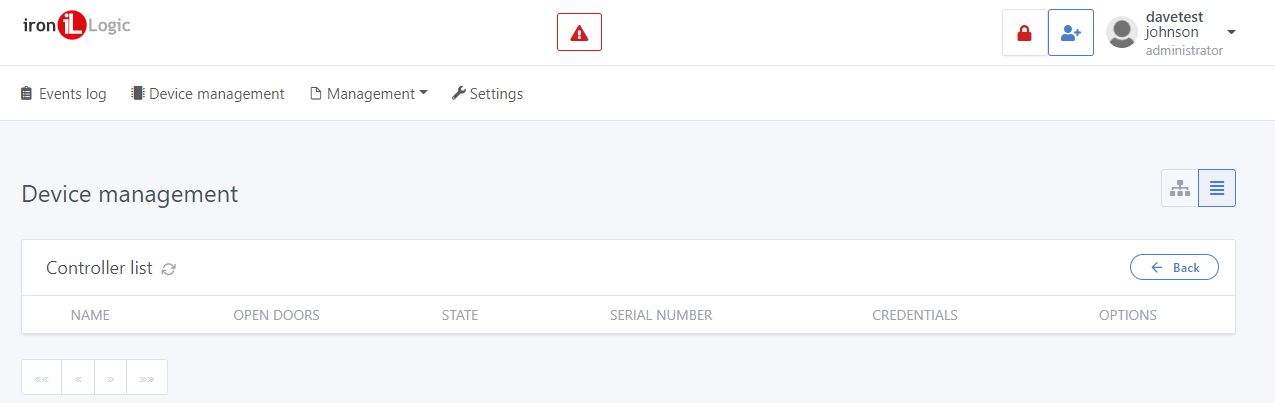
Enter your site details to access the main menu page or equipment page, this examples has no controllers added.
Adding a converter
Click on the site map icon on the right side of the page to access site mapping  then click on
  to add a new converter.
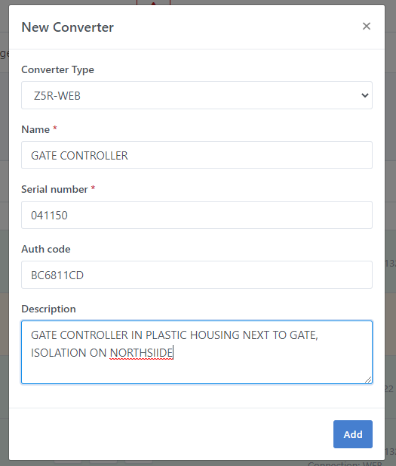
Select Converter type from the drop-down menu e.g. Z5R-WEB, ILGUARD or ILZ397WEB
Add a name for the device e.g. GATE CONTROLLER
Enter the Serial number for the device (041150)
Enter the Auth Code (from the back of your convertor) in capital letters. NB: Customer Auth codes may be used if required.
Then add some description notes like location of the converter on site or other relevant information.
Press ADD to save
Your device will appear on your site list as offline:

Press F5 to refresh your connection and the controller should appear as online in green.

Add any other converters using the method outlined above.
Converter and Controller definition:
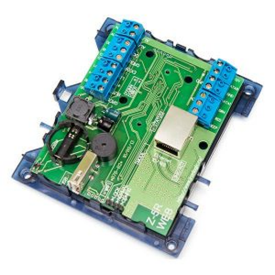
Converters: A convertor is a device that allow connection to software locally through software or through the cloud. Depending on site requirements a convertor may be connected via an RS485 to network, through WIFI or 4G router.
Convertor controllers: Converter controllers like the ILZ5RWEB (LAN,WIFI or 4G) or ILMATRIX II WIFI (Converter/controller/reader) connect to software or the cloud and directly to locks, gates, relays, lighting, inputs, output or alarms .
Controllers: Controllers are the physical interface from reader to locks, gates, relays, lighting, inputs, output or alarms.
Device Types:
| Converter Controllers | ILZ5RWEB WIFI 4G LAN | Controller | ILGuardNET RS485 Controller |
|---|---|---|---|
 |
One or Two Door Up to 8,000 Users On/offline operation WIFI, LAN or 3/4G Connection |  |
Two Door Controller Up to 8,000 Users Network and cloud compatible with ILZ397WEB |
| Converter Controller Reader | ILMATRIX II WIFI | RS485 Controller Reader | ILMATRIX RS485 |
 |
Single Door WIFI reader/Controller 2000 Users On/offline operation Optional Reader entry and exit inputs. | |
Single Door RS485 reader/Controller 2000 Users On/offline operation Network and cloud compatible with ILZ397WEB |
| RS485 LAN Converter | ILZ397WEB RS485 | RS485 Controller | ILZ5RNET RS485 |
 |
RS-485 converter using TCP/IP protocols for cloud connection. Up to 255 controllers per bus (total 510) |  |
Single Door Controller 2000 or 8000 Users On/offline operation Network and cloud compatible with ILZ397WEB |
Device Manager: Device manager allows access to your controller settings, inputs, outputs and alarms settings.
Press the info tab  to access DEVICE MANAGER.
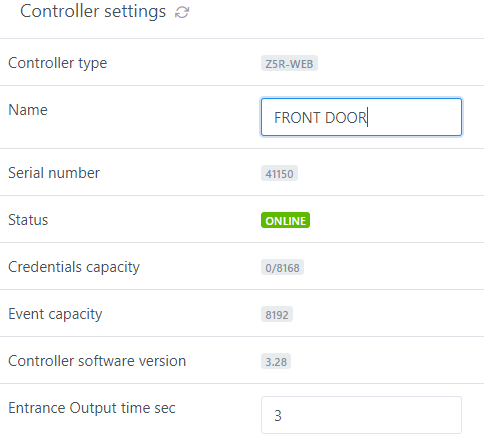
Enter the name of the controller and press save.
Your controller will now display is controller name on the DEVICE MANAGER screen.
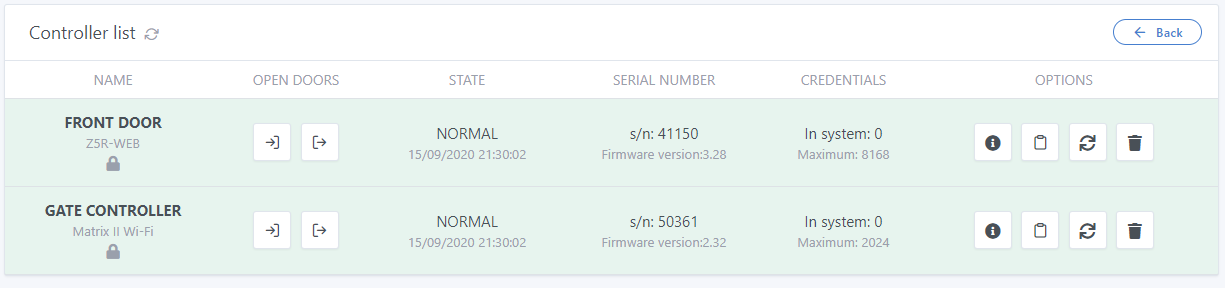
Functions of this page:
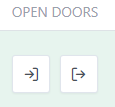 OPEN DOORS: allows you open the entry
  or exit
  door.
door.
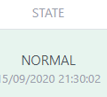 STATE: indicates the controller’s status which can be:
NORMAL indicates the door state is in it’s default state ready for card or remote access.
 BLOCKED: indicates the doors have been locked down, either by lockdown button on the main menu header, indicated by the flashing lock
  , or by input depending on your device or a scheduled state.
 The Open padlock on the controller indicates the controller’s door is open.
This may be an input on the board or a logic output to hold the door open.
Other functions:
 SERIAL NUMBER: Indicates the Controller serial number and firmware version.
 CREDENTIALS: Indicates the number of Cards, Keys, Remotes or PIN codes in the controller.
OPTIONS:
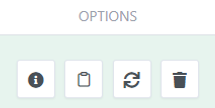 Provides access to controller settings, output times etc.
 Provides instant access to events for selected controller.
 Re-syncronises the controller users and settings.
 WARNING: This deletes the controller from the sites:
To prevent accidental deletion this can only be accomplished when the controller is off line i.e. you
must turn the controller off or disconnect it from the network.
Controller settings and Auto Door Opening
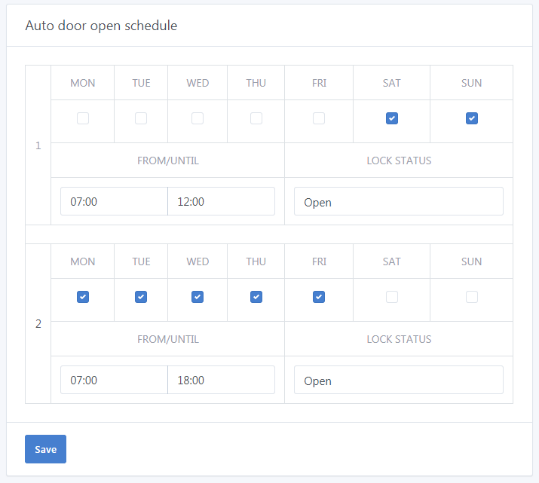
Auto door open schedule:
This feature allows you to set a door to automatically Open and remain open for the set time on selected days.
In this example the door strike for the door is energised on Saturday and Sunday from 7am to 12noon and from Monday to Friday from 7am until 6pm.

The open padlock indicates door open
Outputs modes:
Normal: means the door will respond to cards/keys/pins or remotes according their allocated schedule.
Block: changes the the door status to allow only cards with blocked access to enter. This mode is selected in the credential parameters when adding or editting the card.
Hold Open: Holds the door in an open state from the time a authourised used presents a hold open card. This function is used to open the the door until the hold open card is presented again effectively togglling the door open, for example if a business wants the manager’s card to open the business’ door open when they open the door at the start of the day with their hold open card. The door will remain open until the card is presented again at close of business.
Controller settings
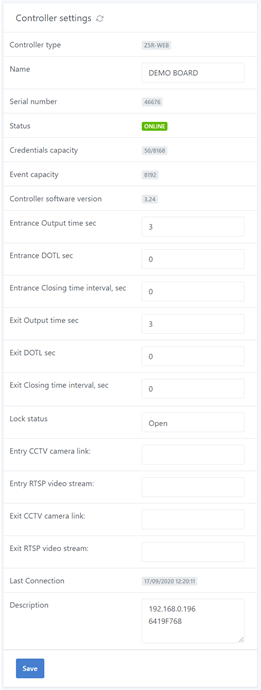
Entrance Output time sec: Determines how long power will be supplied or denied to your lock i.e the opening time in seconds.
DOTL: Door Opened Too Long if installed and configured this input will sound a buzzer and log an event if the door has been wedged open after the DOTL time has expired.
Entrance Closing time sec: Provides a voltage output for a buzzer or light to indicates the door is open.
Exit Output time sec: Determines how long power will be supplied or denied to your lock i.e the opening time.
DOTL: Door Opened Too Long if installed and configured this input will sound a buzzer and log an event if the door has been wedged open after the DOTL time has expired.
Exit Closing time sec: Provides a voltage output for a buzzer or light to indicates the door is open.
Lock Status: Indicates the current lock status Open, Normal, Hold Open or Blocked.
Open: Door current open.
Normal: Door is awaiting valid reads or triggering.
Block: Door is blocked to all cards except blocked cards.
Hold Open: Door held open by a hold open card.
Entry CCTV camera link: If a CCTV camera is linked to the controller, enter the IP address of the camera here to capture footage of the door or gate opening.
Entry RTSP camera link: IP address of camera
Exit CCTV camera link: If a CCTV camera is linked to the controller, enter the IP address of the camera here to capture footage of the door or gate opening
Exit RTSP camera link: IP address of camera
Setting Up A Site
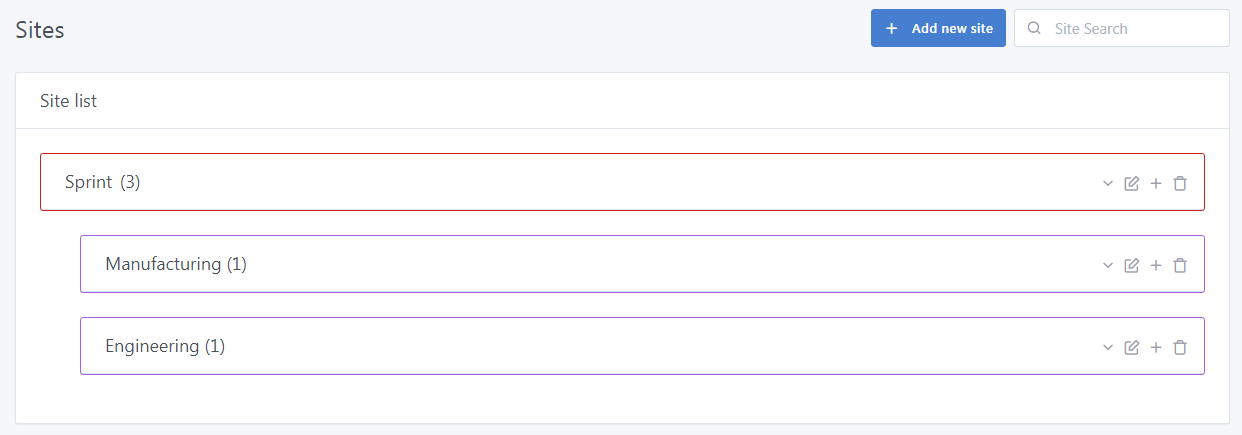
Sites: A site is the foundation of the access control system, whether one device or many, one location or many all devices must be added to a site. The site must contain at least one converter or converter/ controller: the controller allows access to all doors gates, entries and devices belonging to the site.
Example:
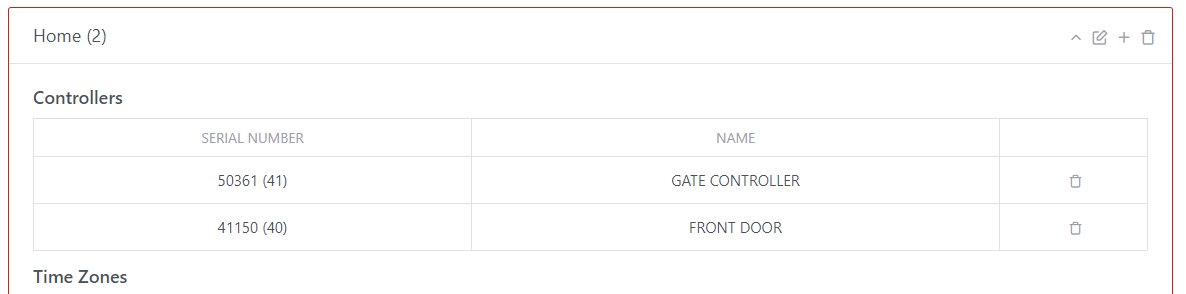
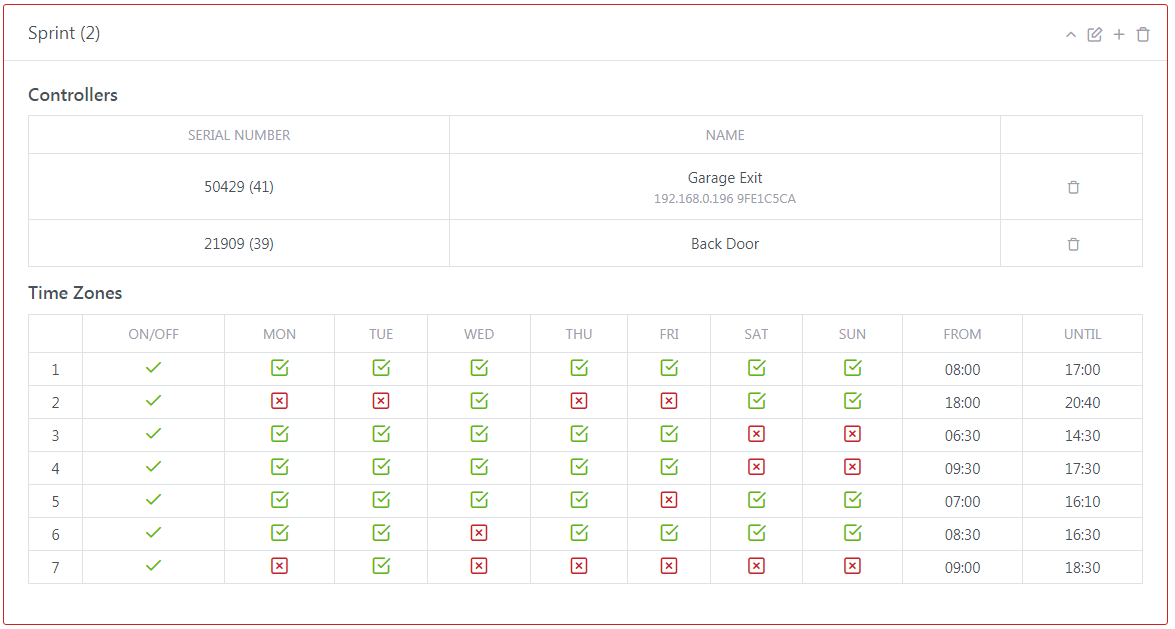
This site called Home has two controllers 50361 GATE CONTROLLER and 41150 FRONT DOOR, we can see the controller types in Device Manager, these controllers are both Converter Controllers.

Adding a New Site:
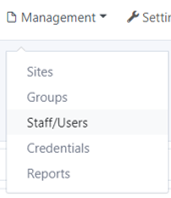
Select sites from the Management drop down tab.
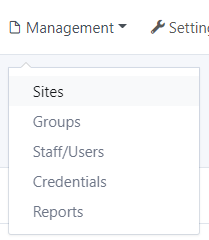
Click on  to add a new site or Site Search to add a new sub site to an existing site.
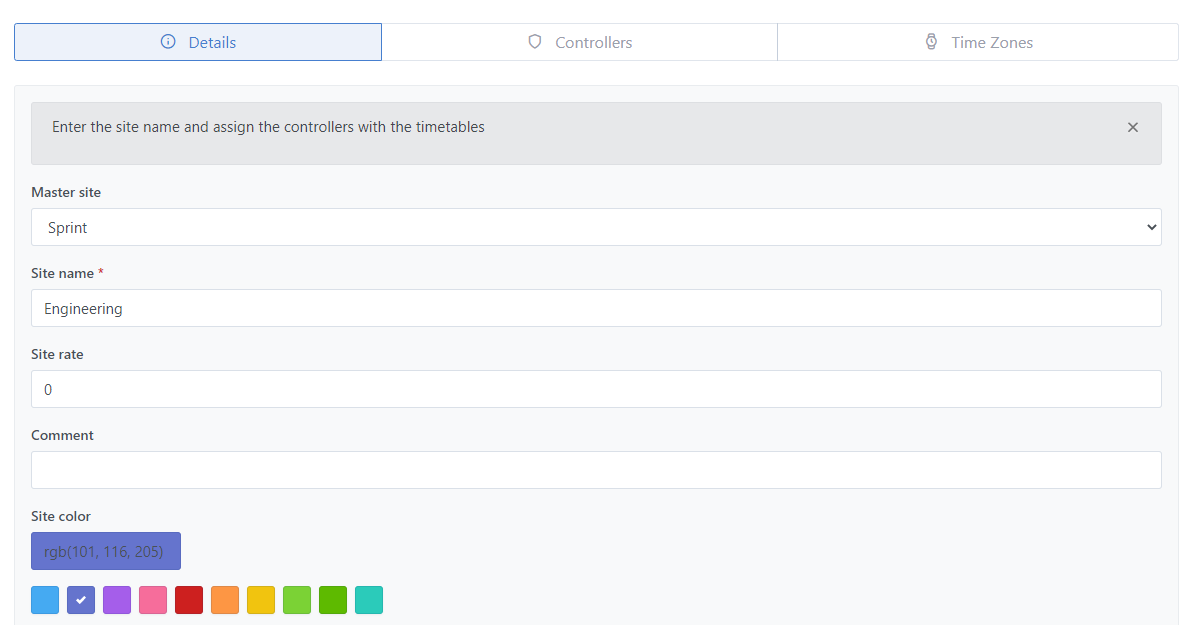
Add the site name in the Details tab followed by enter your site name and any comments regarding the site along with the site colour.
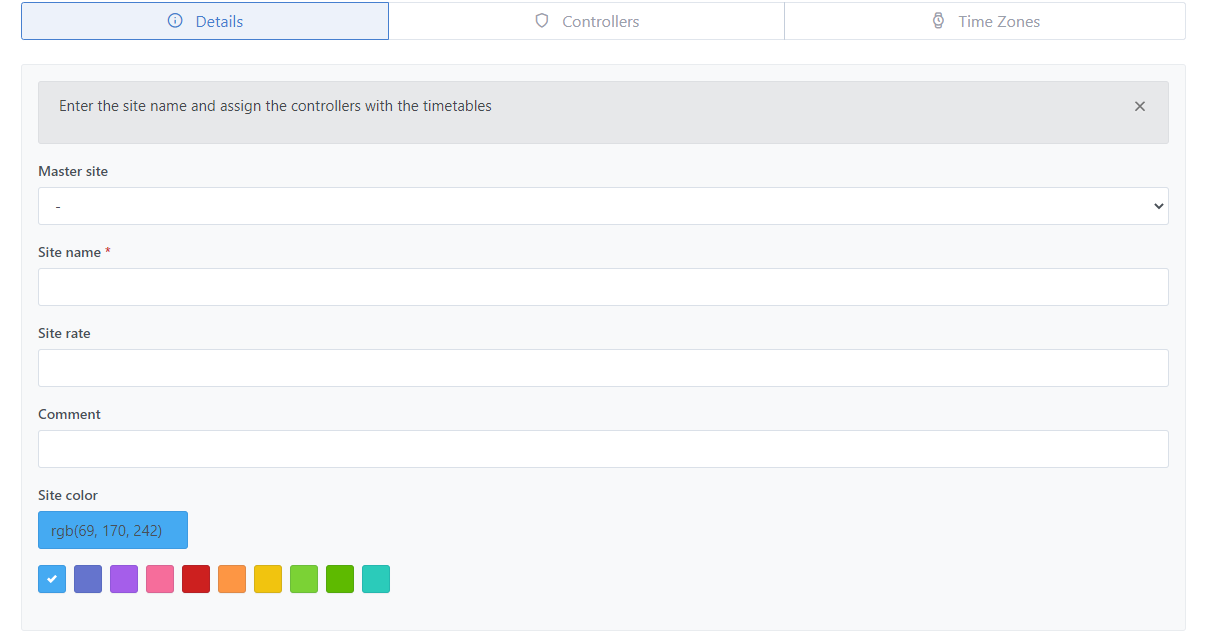
The site colour will appear as a rondel next to the users image in the Staff/User list as well as in the STAFF/USER SITE which indicates the last site used by the user.
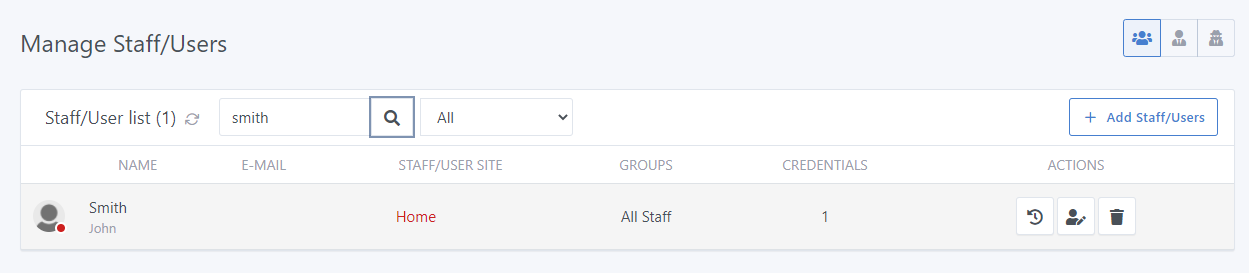
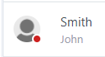 In this example John Smith’s last known location was Home as indicated by the red rondel and the Red Home location USER/Site location text on the User/Staff listing.
NB: Site Rate is a Time and Attendance function discussed in the Time and Attendance section of the manual.
Master Site and Slave sites: When creating sites it is important to understand the relationship between Master and Slave sites, the master site groups shares its time zones and access levels with any “slave” controllers for the site. For example if a company has 4 common entries, carpark entry and exit, a front door and back door as well as sub entries, groups or department like Engineering and Manufacturing, the Master controllers will be, front door and back door as well as carpark entry and exit; when you create other groups within the site they are allocated the Master site and then their specific area or slave site.
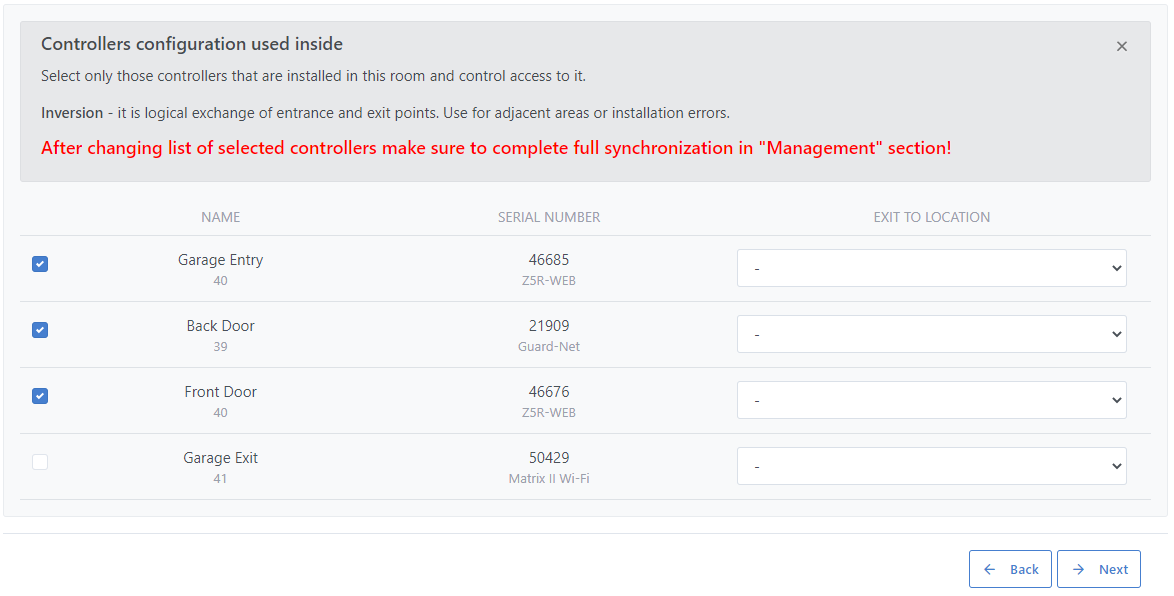
Slave site or Department:
When creating slave site or department select Add New Site and then select Master Site in the drop down menu, the new site or department will also have access to access of the Master site in this example the Engineering department will have authorized access to Front Door, Back Door, Garage Entry and Exit from the master site.
Press Next to Save and continue.
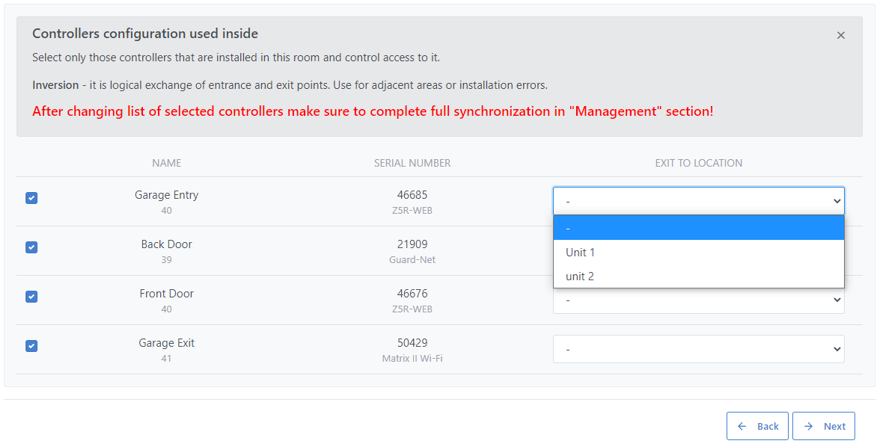
Select the controller you want the allocate to the site in this example a Z5R-Net 2227.
Click Next when you have finished adding controllers.

Site Timezones:
Site Timezones determine when a controller may be activated by Staff/Users at a door or device. There are several Timezone with the controllers data base which can be allocated to different groups. Whilst all users may have their own custom timezone or schedule it is best to standardised for bulk allocation of access.
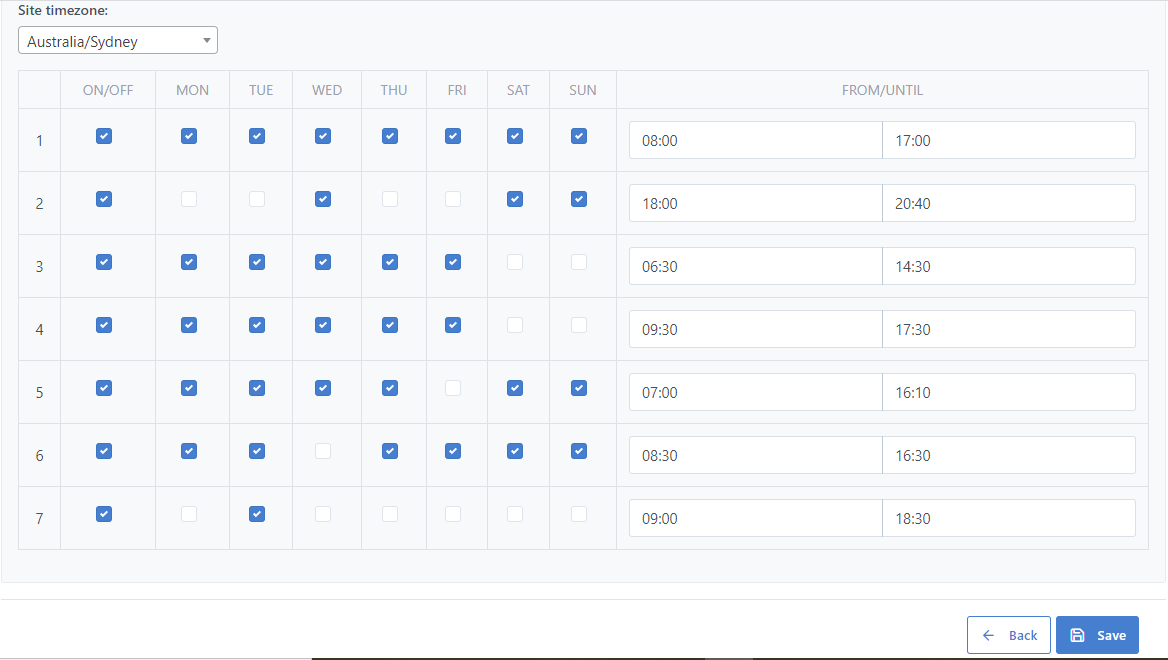
When you have finished allocating days and timezone to the controller press save to continue.
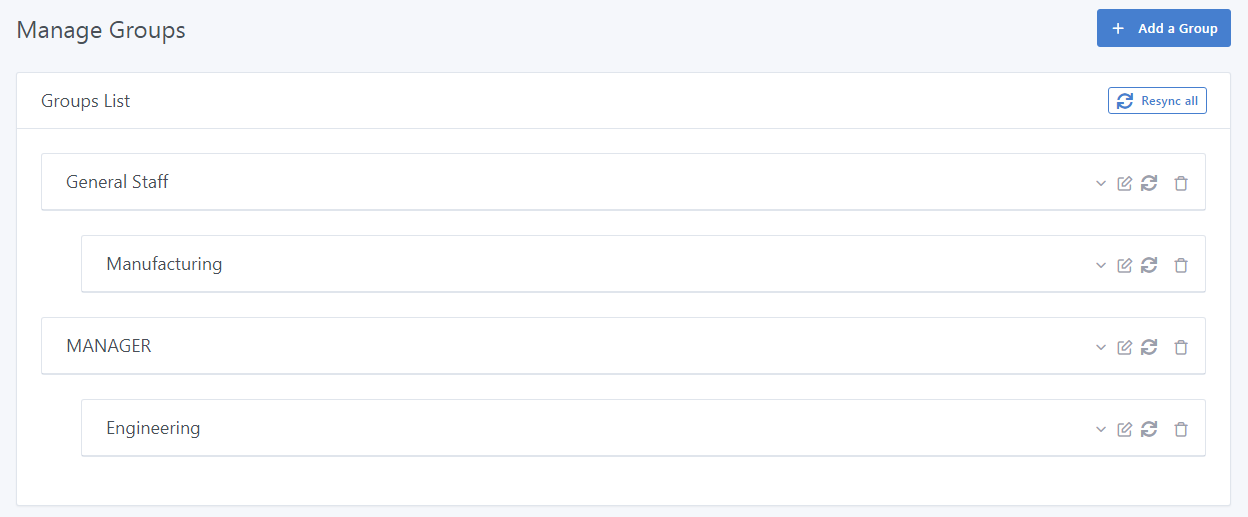
GROUPS
A group is a collection of people who share the same or similar access levels, in the example we have used above we have specific Slave Controllers for Engineering and Manufacturing whilst they sharing common (the master site) entries as well as General Staff and Managers.
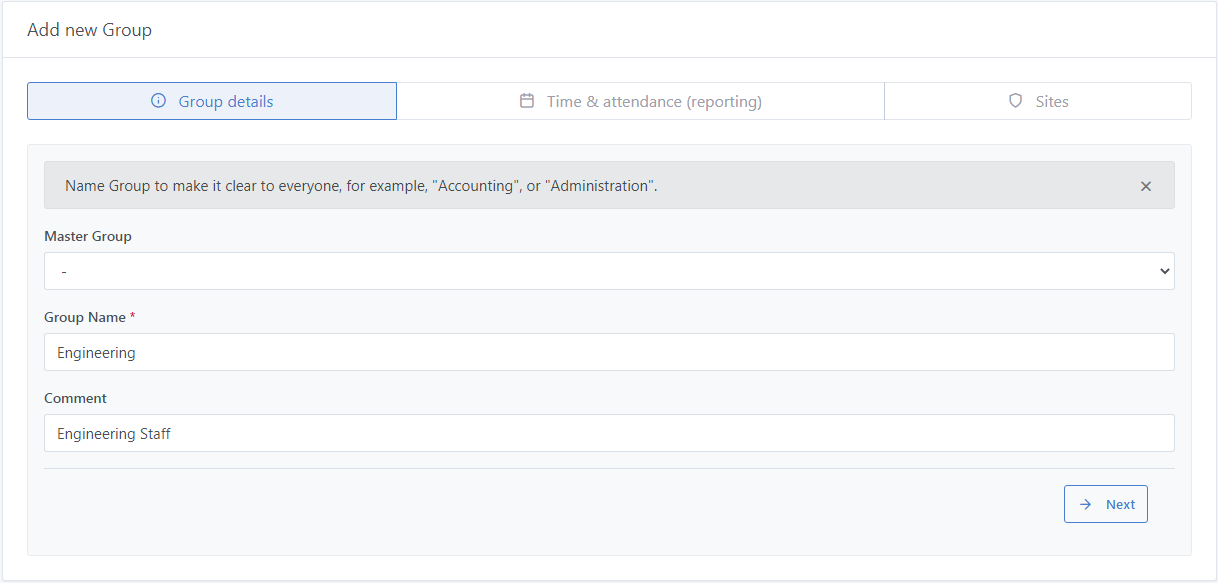
Adding a new Group:
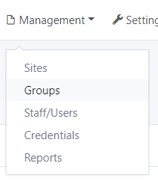 Select Groups from the Management dropdown menu, the select Add a Group.
 .
.
Name the group and add any comments about the group (in this example I have added a note that this Group is intended just for contractors), and then press Next.
Time and attendance (reporting)
Time and Attendance reporting is related specifically to taking staff movement within specific work times. This report directly relates to the Discipline report in the report menu.
Example: In the example here we have made a group specifically for contract who work between 7am and 6pm. If we wish to ensure that these contractors have a steady work pattern, arriving on-time and leaving on-time we select the time as listed and then refer to the discipline report to ensure contractor are at work arriving on-time, leaving on-time, and logging off.
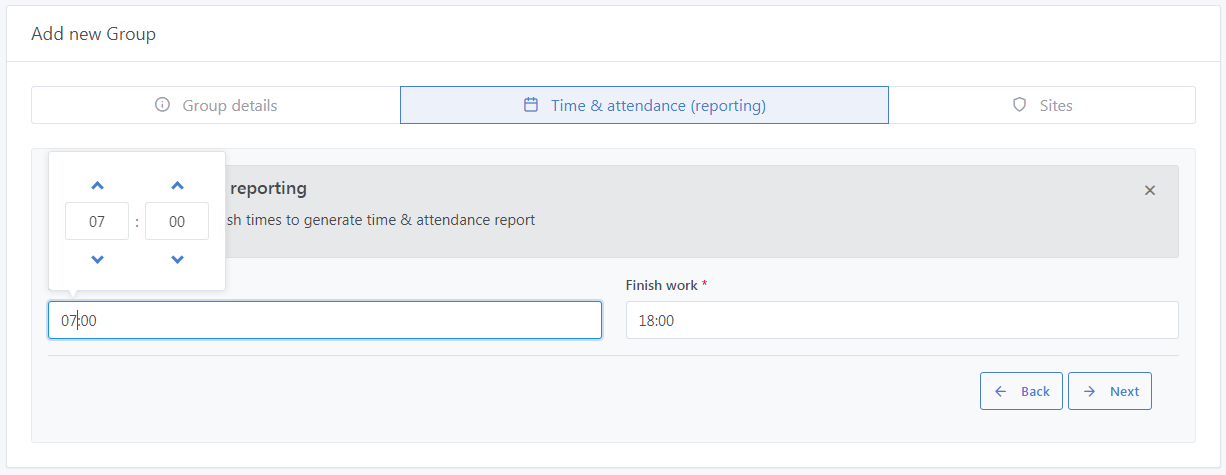
For this group we have selected a Start time of 7am and finish time of 6pm, this is for REPORTING ONLY this is not time zone for this group.
See notes below for Discipline reporting.
Once you have selected your Start times and Finish times for your reporting (if used).
Press Next to save and continue.
NOTE: Discipline reporting.

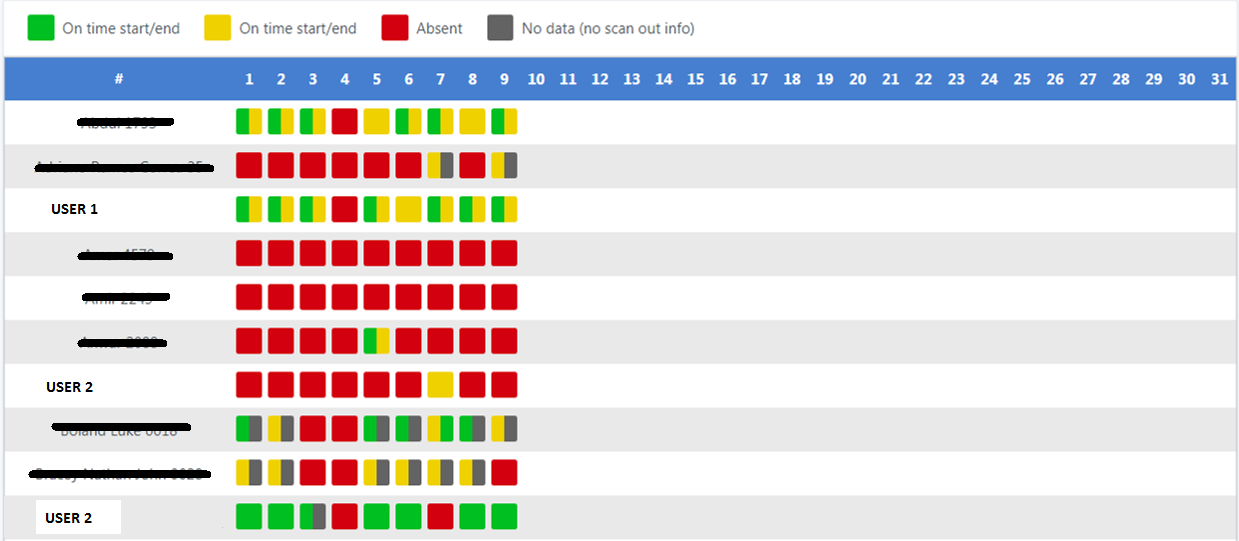
In this example USER 1 arrived on time before 7am on Day 1,2,3,5,7,8 and 9 but left before the finish time on all days except the 4th when they did not work. USER 2 only worked on 7th but arrived late and left early. USER 3 arrived on time on day 1,2,5,6,8 and 9, arrived on time on day 3 but did not log out and did not work on the 4th and 7th day.
Allocating a Site:
Once you have attributed start and stop reporting times for the Group allocated the areas where they have access.
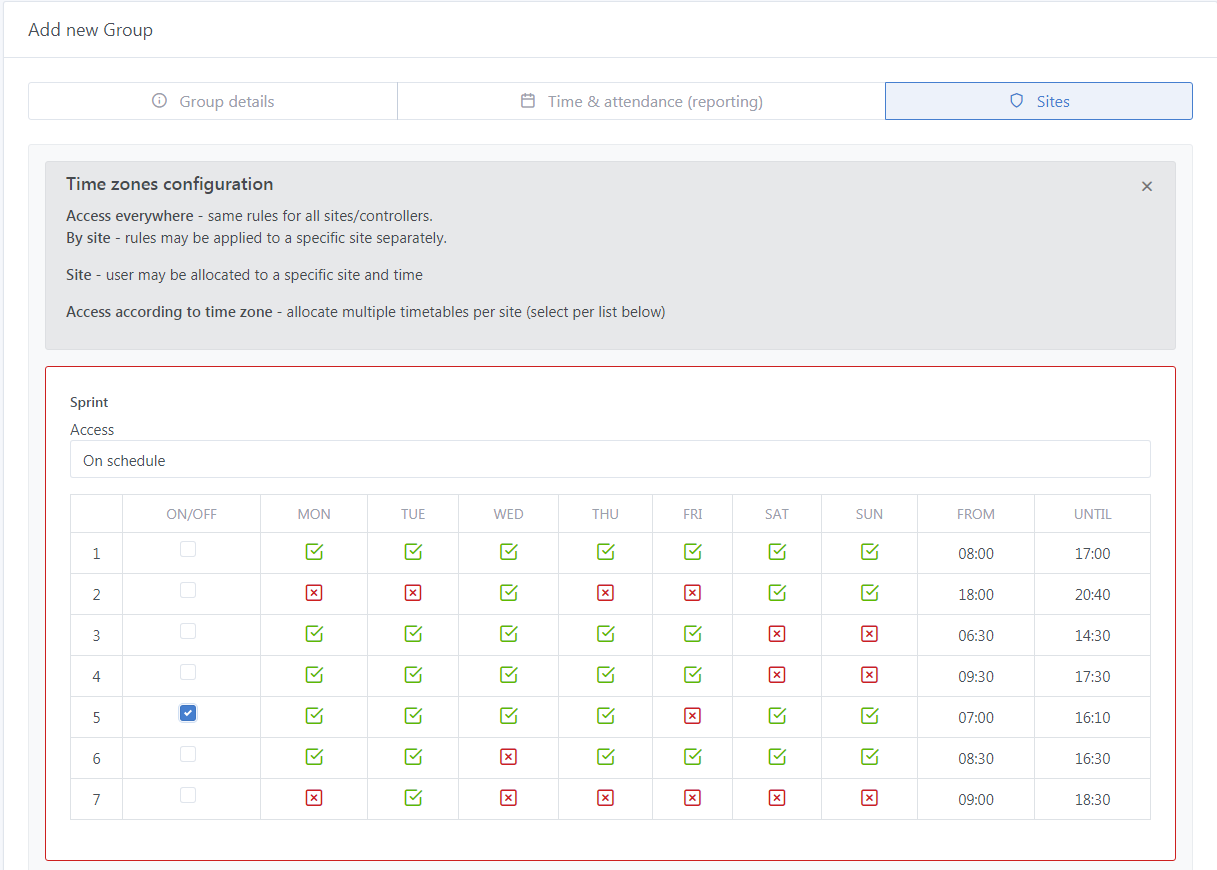
This will allow the Engineering staff to enter the Company's site site which includes the Front Door, Garage Entry and Exit and the Back Door.
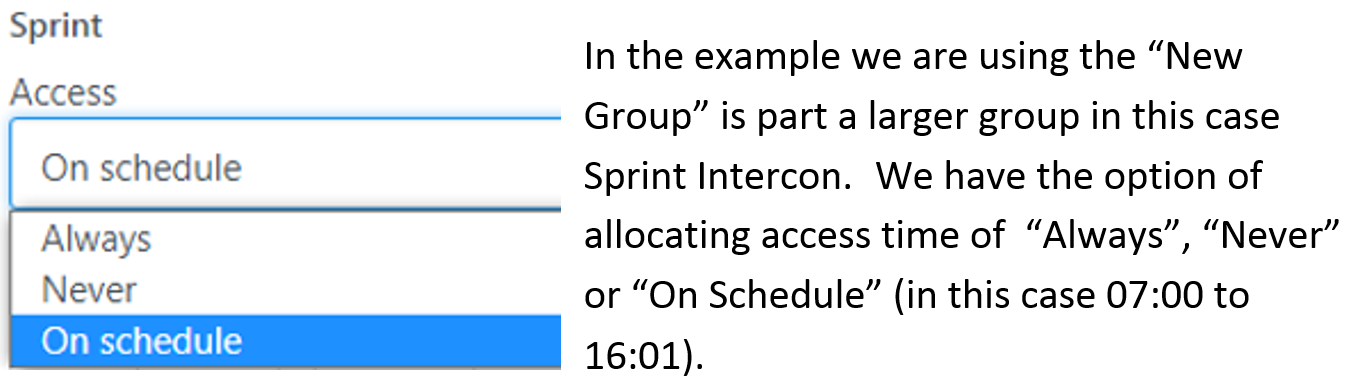
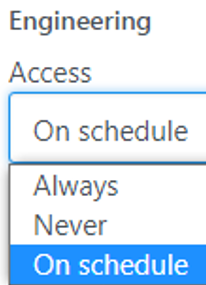
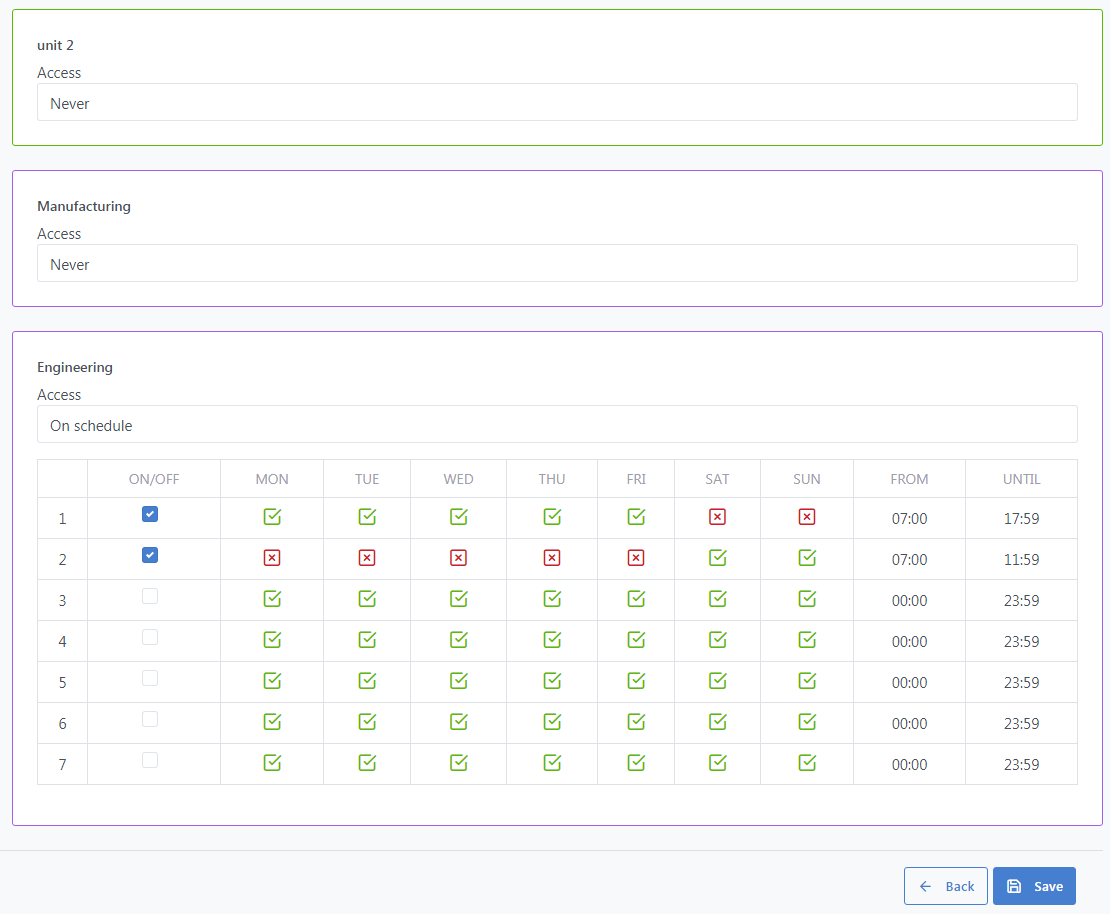
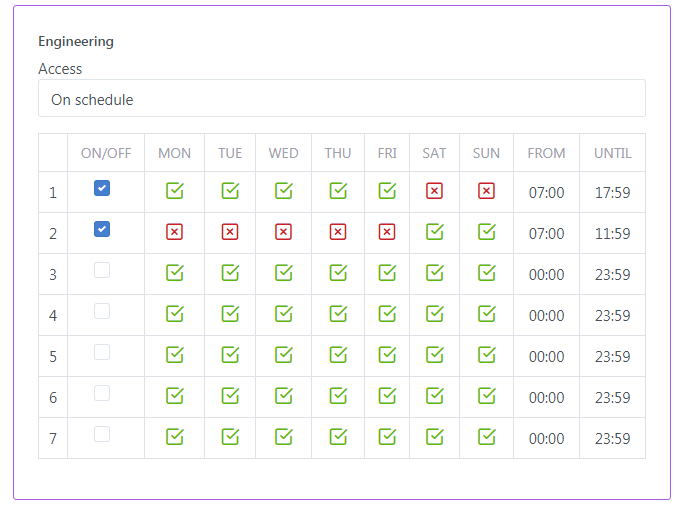
The Engineering group in this case will then have to be granted access to the Engineering area. In the example we are using the New Group Engineering will have the option of allocating access time of Always, Never or On Schedule (in this case 07:00 to 17:59) and Mon to Fri and (07:00 to 11:59) Sat and Sun (see below).
Note: Engineering have no access to Unit 2 or Manufacturing.
Once you have finished have finished adding your groups they should appear in the Manage Groups menu.
Menu Options:
 View the Time Zone and Site summary for the selected site.
 Edited the selected site.
 Re-Sync the site (re-send all Time Zone and Details).
 Delete the site.
Staff and Users:
Staff and Users should be added here, select from the Management drop Staff/Users to add or edited new users of your site or sites.
Select Staff/Users and then press 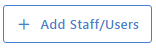
to Add new staff.
Within the Manage Staff/Users Menu options are:
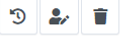 Displays entry and exits for the user selected.
 Allows you to edit User details, access, credentials or email access.
 Deletes all user details (note you can temporarily disable a user without deleting).
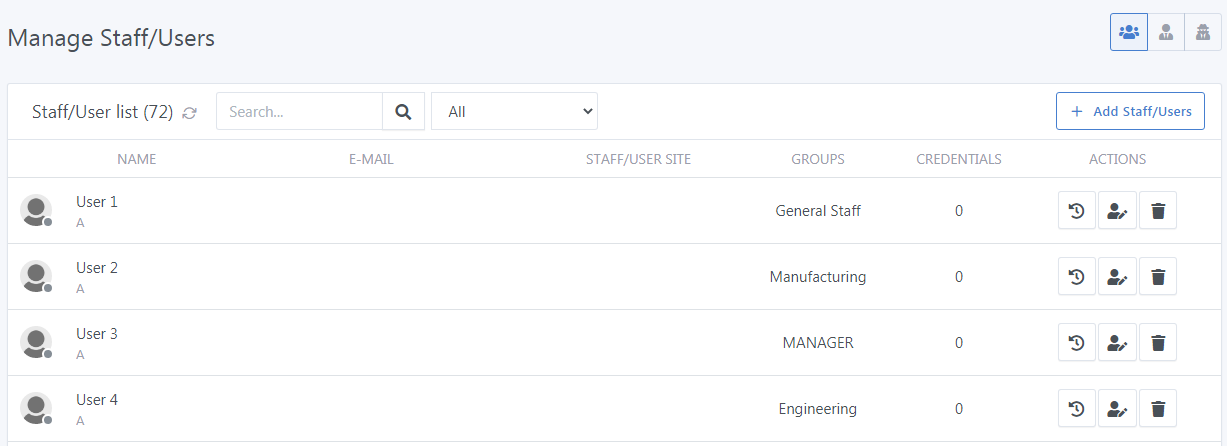
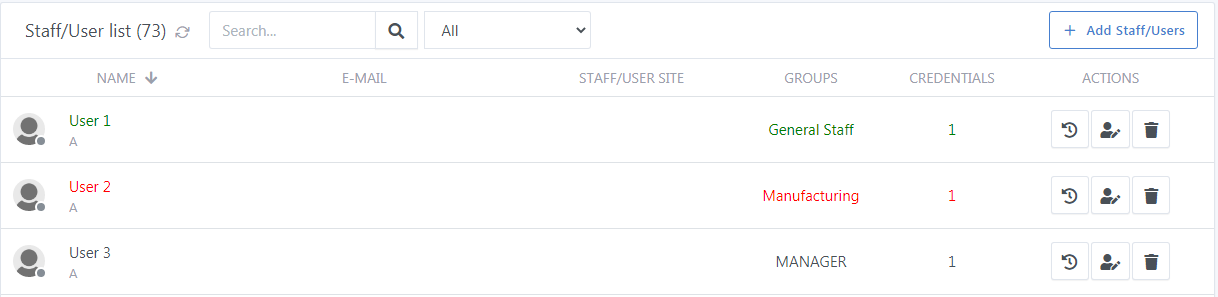
The Manage Staff/Users displays a detailed summary of all users including Name, E-MAIL, STAFF/USER SITE (Last known Location), Groups and Credentials (Cards/Fobs).
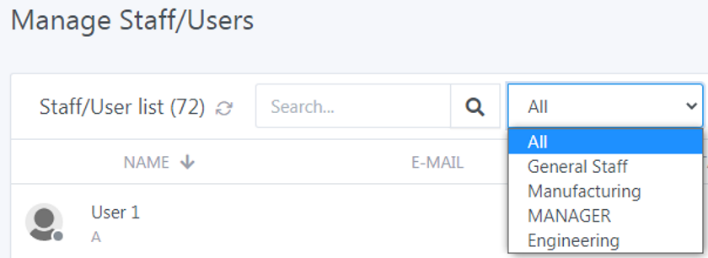
Filtering: Use the drop down menu to select the Group you wish to display. Only Users from the selected groups will display.
Adding a New User
Options:
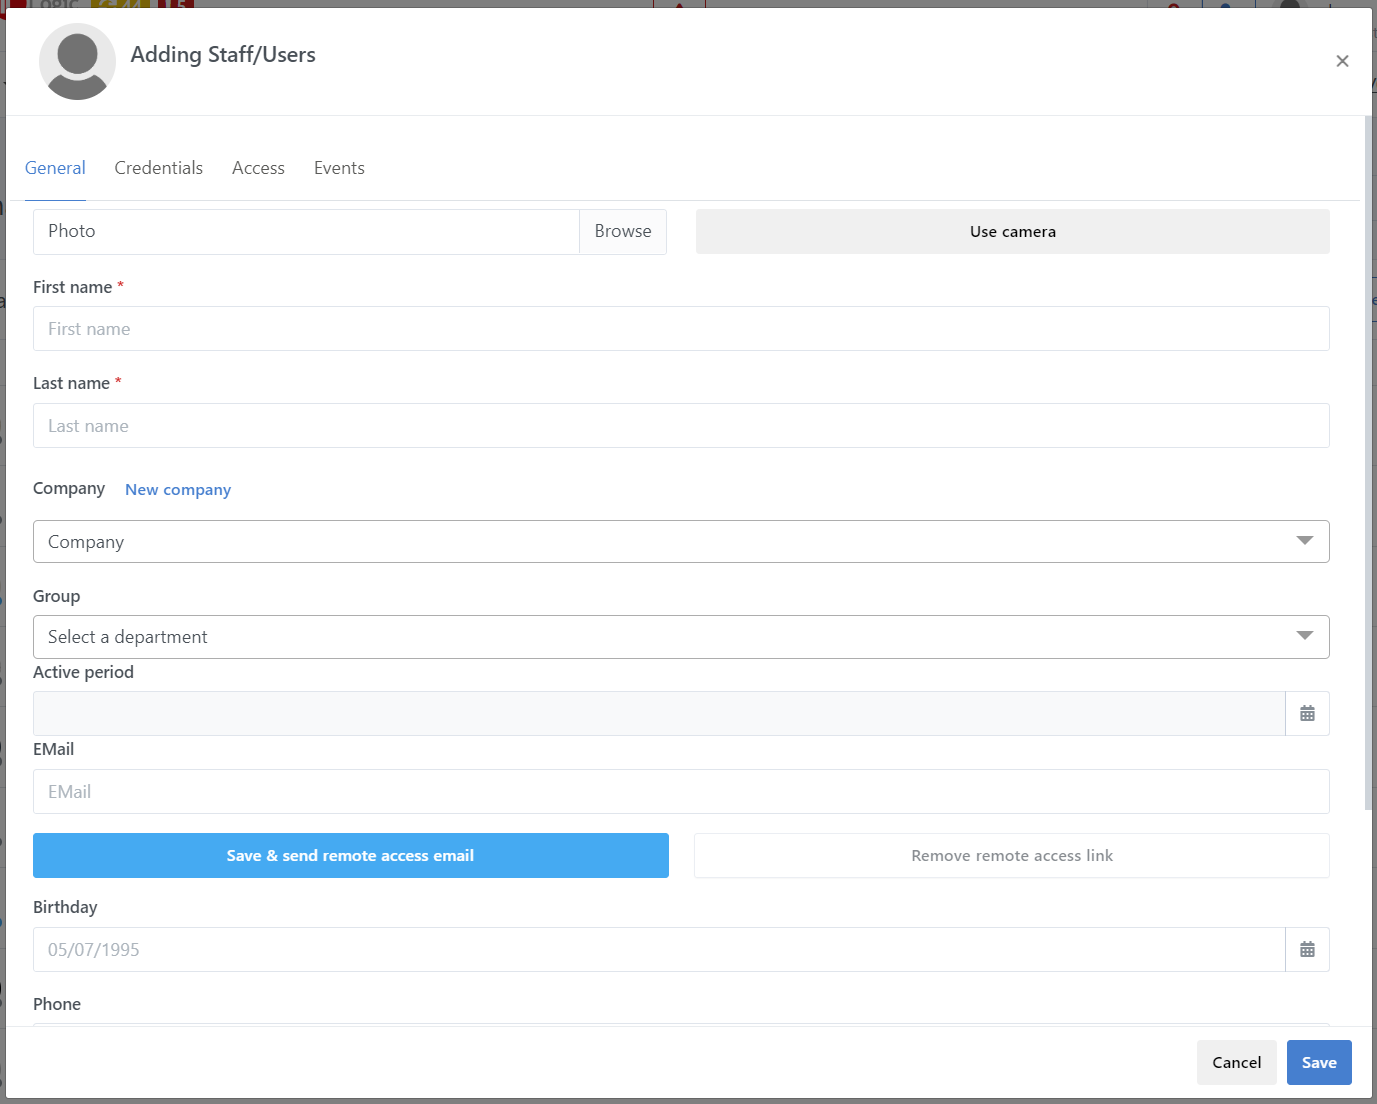
Photo: Allows the addition of a photo using a webcam (Use camera) or from a file (Browse).
First name: User name. Last Name: User Last name.
Group: As Detailed above users can be grouped together if a group of users share the same access areas and access levels.
Valid From: Determines the Date and Time at which a credentials becomes active thus granting access.
Valid Until: Determines the Date and Time at which a credentials becomes in-active thus denying access.
E-mail: Email data only. If being used a data only enter the email address here (do not press) Save employee & send remote access email. To save Data only press SAVE at the base of the page instead.
Email Access: Allows access to selected areas via a web link either via phone or computer. For this option enter the email address and select the user’s Group, then press Save employee & send remote access email. For more details see below.
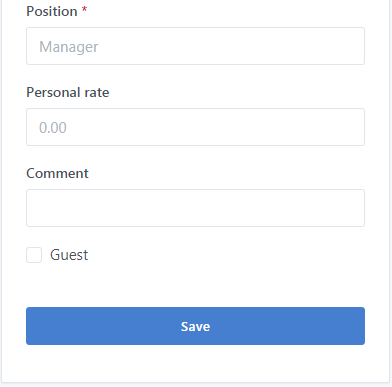
Position: Job Title if Required.
Personal rate: Time and Attendance function.
Comment: Any Comments about User Licence Plate etc.
Guest: This option can be selected for additional filtering of non staff members who have access.
Save: Save all data and access.
Credentials:
Credential are either Cards, Fobs, Keypad pins or Email acccess.
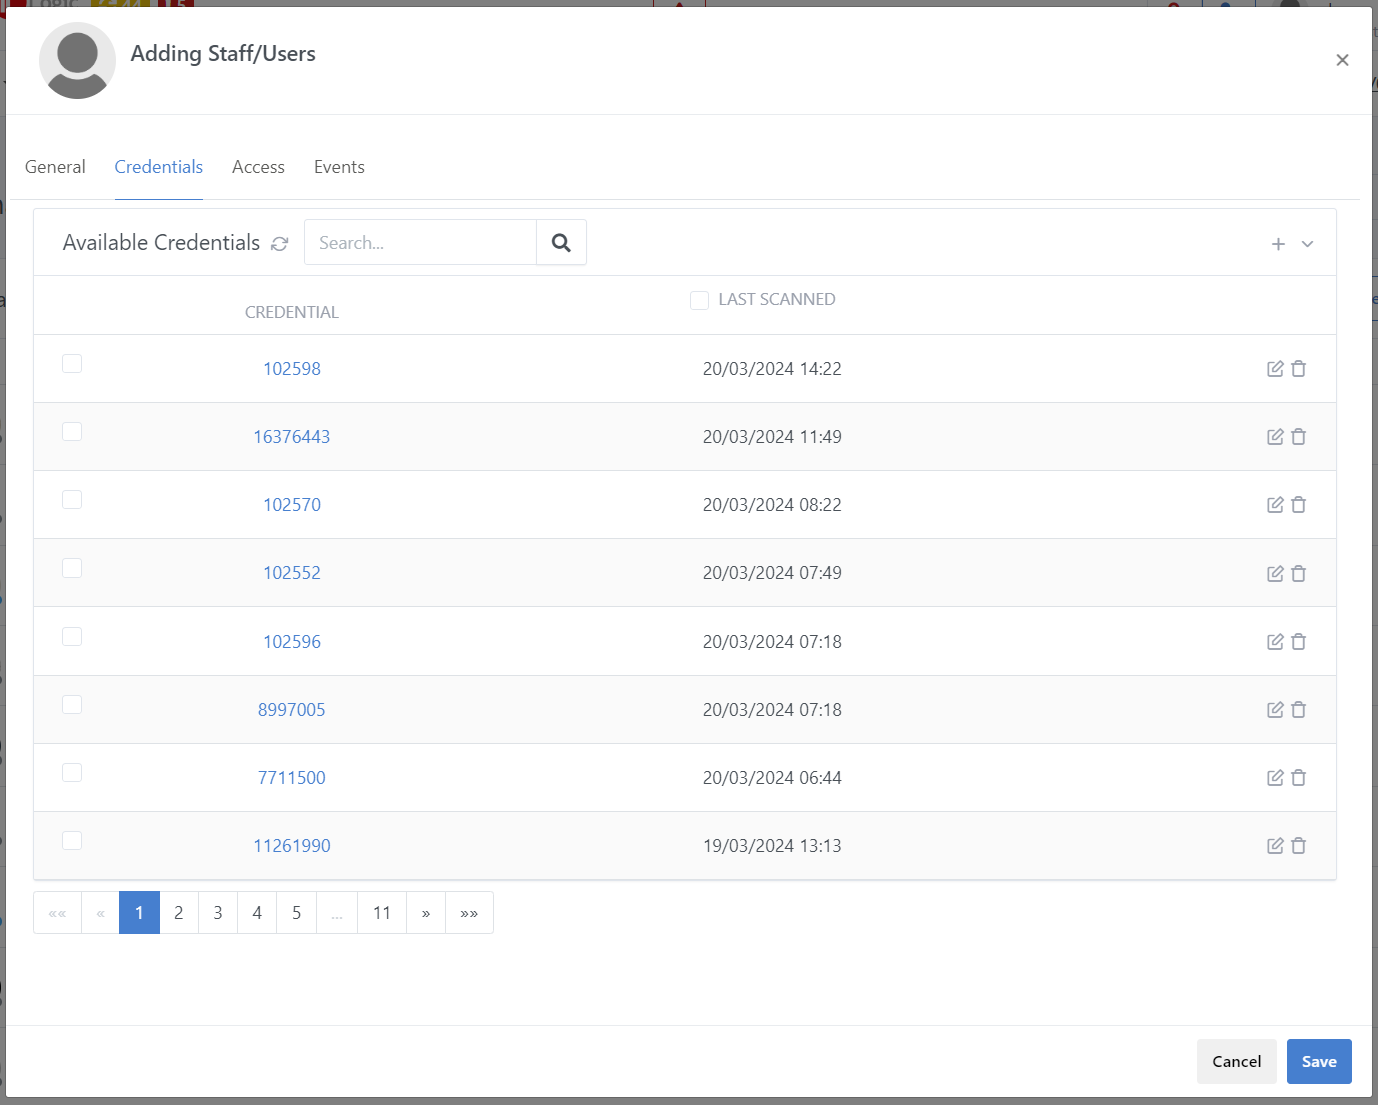
The above Available Credentials are 128,07269 as prox card with a site code of 128 and card number 7269, 000,00004 is a keypad credential site code 0, code 0004.
These credentials can be  edited or
  deleted.
Adding New Credentials:
Click on the + Add Credentials to add a New Card, Fob or PIN code for a Keypad.
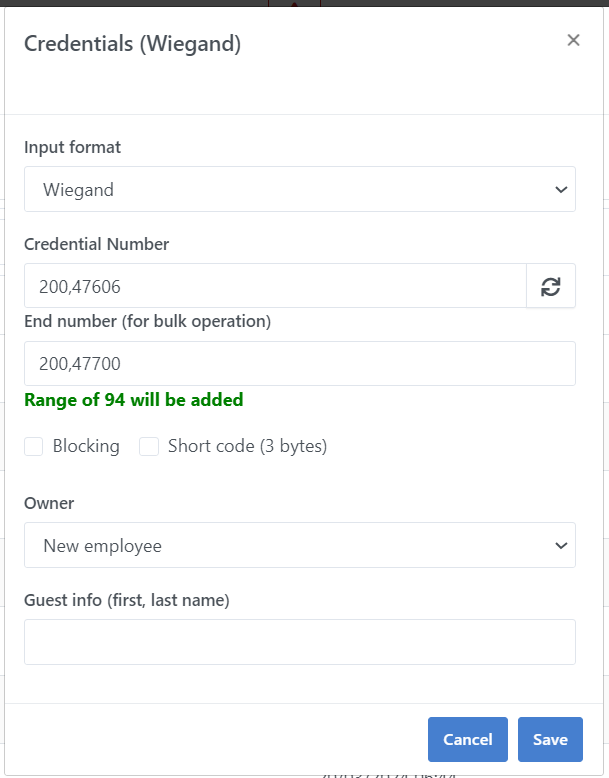
Input format: Weigand is the default. Other Options include Dallas Chips reader (iButtons), HEX and Decimal (keypad format).
Credential Number: Site Code, Credential number.
Blocking: This is an override card, this card is permitted access during lock down or Blocked mode.
Owner: This will display the user if the credential is allocated, for a new credential this should be undefied.
Cancel / Save: Saves or Cancels the data entry.
Example:
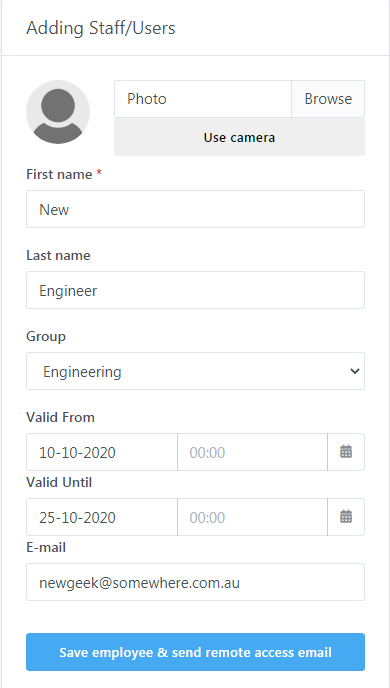
For this Example we are adding a new employee call New Engineer to the Engineering group.
The Employee’s card is only valid from 10/10/20 until 25/10/20.
If we want to grant email access we click on Save employee & send remote access email, if not do not click enter here click on Save at the bottom of the page.
Enter other personal details as required and the add a credential.
To add a card, PIN or other credential from the Available Credentials dialogue box and press Save when complete.
Other Function:
 Add New Credential: If you wish to manually add a new card, PIN or other credential. You may wish to use a registration reader or simply present a card/fob or PIN simply entry or any door. The credential will appear as the Last Used credential.

NB: if you adding Weigand credentials add using site code, followed by coma , then the card number e.g. 128,7269 as detailed above. To change the format see settings.
Once you have allocated a credential for New Engineer you can assigned the default group, Engineering or customise access using the option boxes below credentials. 
gives your new user access to all controllers (door/gates).
NB: Uses with access everwhere and always appear in green text in your user list.


 gives your new user standard site access as configured.
 will apply standard access rules and schedules from the “group” selected
when in the group dropdown.
Engineering group has access to the all the areas allocated to the company (Common Doors) as well as those Specically allocated to Engineering.
Disabling a user
If you need to disable a User whilst retaining their records you can cancel all access by entering
Never in the Personal Access Settings field below credentials.

The disabled user will appear in Red on the user list an will no longer have access.
NB: The User’s credential may then be re-allocated to a new user if required.
Settings
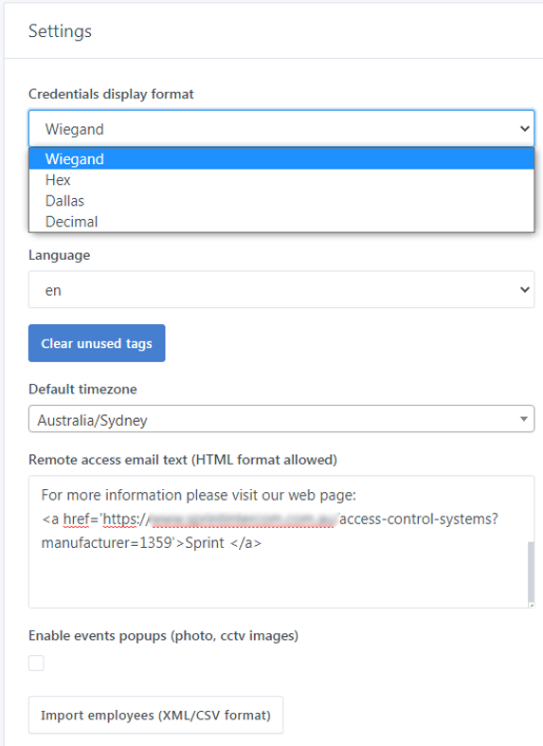
Settings allow you to adjust the:
- Credential display format between Weigand (SC:NUMBER), HEX (HEXIDECIMAL), Dallas (iButton), Decimal (Decimal numbers or Keypad mode)
- Language default = en (English)
- Clear Unused Tags, clears unused tags from the credentials list
- Default timezone, Adjusts your time zone
- Enter your email info that gets sent with email access, you can add as much data as you like to this field to provide site or access details to you users being grant access via email. Standard email:
Hello User Name
The Site name has granted you remote access for the following site(s): SITE NAME Access valid from: date and time till date and time Please click on the link below and then use the app's Entry Button to gain entry to the door or gate.
FOR THE SAFETY OF OTHERS PLEASE DO NOT USE THE THIS LINK WHEN NOT IN CLEAR SIGHT OF THE GATE OR DOOR.
- Enable Photo pop up, if selected this will display the Users photo when access is granted or will display a CCTV if configured.
- Export employee data, allows you to import user data in excel format.